Category Archives: Dips/Spreads

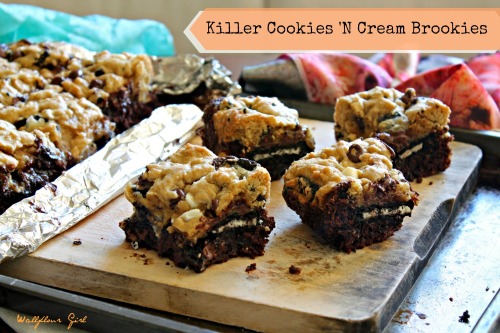
Killer Cookies ‘N Cream Brookies and Oreo Butter: An Online Bake Sale for the Philippines

How does one not lose all control when digging a fork into this warm, melting gooey Oreo lovers’ mess?
Killer Cookies 'N Cream Brookies gif 3
Oh, that’s right. One doesn’t. If you couldn’t tell by the gif.
But before I get started on these outrageous Oreo cookies ‘n cream brookies (yes, that’s a brownie + cookie smashed into one sugar-coma-inducing concoction), I want to tell you about a really important event, and the story behind why I decided to tackle these in the first place.
Killer Cookies 'N Cream Brookies 2--112113
As anyone who even remotely follows world news knows, a terrible storm hit the Philippines a few weeks ago. While the story has sadly faded off the radar of our fast-paced, sensation-seeking U.S. media, the relief and rebuilding efforts–as is true with any disaster, big or small–are still happening around the clock, around the world, to help the affected people and areas. I have spent ample time researching and making my own donations to the Philippines Red Cross (which, by the way, I definitely recommend if you’re considering making donations but worry about where your donations actually go–they’re one of the established agencies that you can count on to get your money to the relief spots), but wasn’t sure what I could do beyond that to spread the word. Then, by some unlooked-for chance, I stumbled across Tina’s blog, and get this: she is hosting an online bake sale to raise funds to support the relief effort! Very important? YES. I almost never do plugs for other blogs, but please consider learning more about how you can help through a small gesture that will go a long way, no matter what source you choose (as long as it’s a reliable one).
Killer Cookies 'N Cream Brookies 5--112113
How it works: 1. Tina is accepting ‘virtual baked good donations’ until FRIDAY, 11/22/13. All you have to do is fill out a pledge form and send her a photo of the goods you will be ‘selling’ for donations.
2. Starting on MONDAY, 11/25/13, bidders can view all of the goods-for-sale at Tina’s site. Bids start at $20. The highest bidder at the end of the day ‘wins’ the baked goods he/she bid on and will donate that money directly to Sagip Kapamilya, a relief foundation for the Philippines.
3. The baker will ship the goods directly to the bid winner. That’s it. Simple, and good.
Killer Cookies 'N Cream Brookies 8--112113

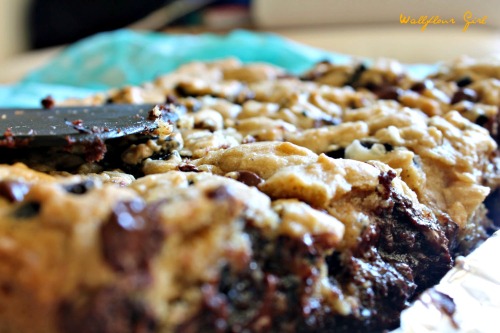
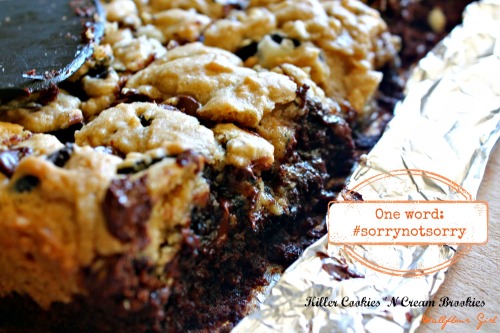
(Sorry, this up-close shot of gooey melting fudge and gooey cookies is necessary.)

If it’s within your resources to do so, please consider bidding! Again, this is a really worthwhile cause that I love because it emphasizes what we have: an amazingly strong community of bakers and readers who champion all sorts of causes, not just ones that deal with food. In case you’re curious about my particular entry, I’ve decided to go all out by theming my package with one of my all-time favorites: the Oreo cookie. Below is the description I included for my package:

Killer Cookies 'N Cream Brookies 25--112113

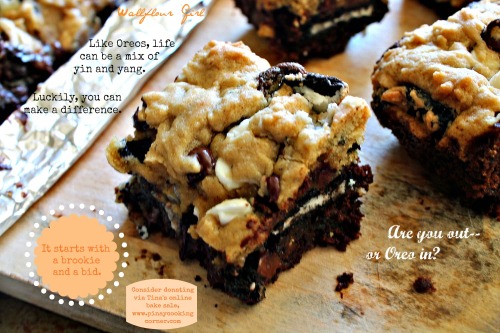
Oreos are the yin-and-yang of the cookie world: A creamy filling sandwiched between two decadent chocolate cookies. Like Oreos, life is a mix of yin and yang…and when it hits, it can hit us hard. Fortunately, now’s your chance to do some good while getting outrageous Oreo good out of it. Your Outrageous Oreo package contains a variation on my most popular brookie recipe: a fudge-packed chocolatey brownie layer topped with a gorgeous cookies ‘n cream chocolate chip blondie and whole Oreos jammed into the gooey center. You’ll also want to prepare to sink your teeth into two GIANT Oreo-stuffed chocolate chip cookies. And if you aren’t Oreo’d out by the time you reach it, a jar of homemade Oreo white chocolate peanut butter spread will be sure to tempt your spoon (and your willpower) for as long as it lasts. The perfect package for any Oreo lover. So what do you say: Are you out, or Oreo in?
Killer Cookies 'N Cream Brookies 11--112113

I know this isn’t “my” bake sale…but thank you, thank you, thank you!

Killer Cookies 'N Cream Brookies 14--112113

But before I wrap things up here, I seriously want to give you an idea of how awesome this explosion of outrageous Oreo baked goods really is. I kid you not: one entire 15.3 oz. package of Oreo cookies went into the making of this package. So whoever gets this is advised not to look at the nutrition label on a package of Oreos for the next month or so. Holy mackerel, that’s a lot of Oreos!

Killer Cookies 'N Cream Brookies 20--112113

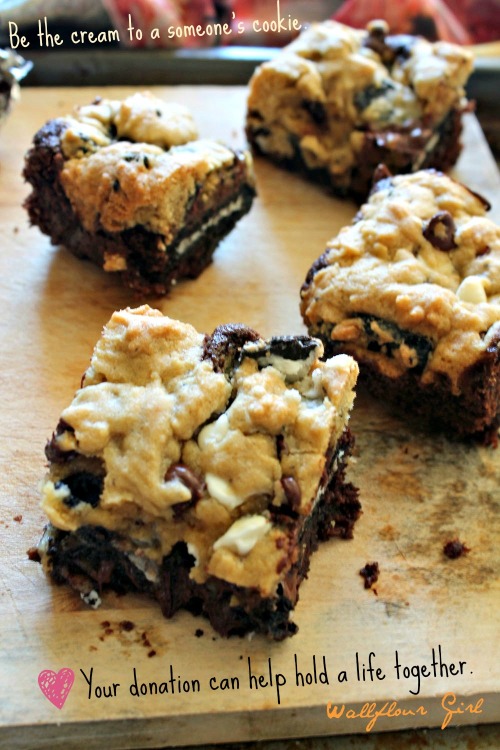
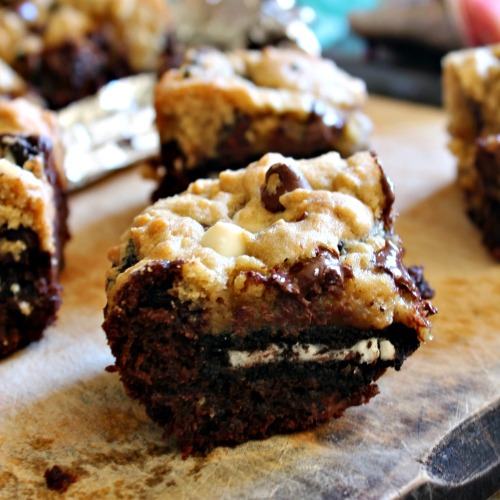
The Killer Cookies ‘N Cream Brookie: Maybe you’ve heard of a brookie before. For those of you who haven’t, it’s made of crack a cookie layer smooshed on top of (or under) a brownie layer. Sound simple? Hang on while I say ‘ha ha ha’ and dispel that funny little notion from your head. Of course, a brookie CAN be simple. But what I love about this ramped-up killer cookies ‘n cream version is that it takes the fudgiest, gooiest brownie base, crams a whole layer of WHOLE OREO COOKIES all up in the there, and then tops that off with a crazy chunky, chewy, cookie-n-creamy chocolate chip blondie bar layer.

YEAH. BET YOU DIDN’T SEE THAT COMING. WHAT NOW BROOKIE.

Killer Cookies 'N Cream Brookies 30--112113

Oreo Butter 2--112113

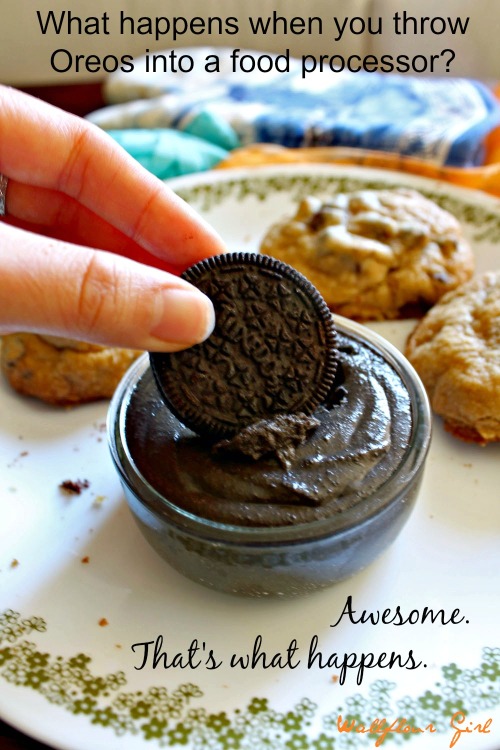
Oreo Butter: What happens when you throw half a package of Oreos into a food processor with white chocolate and peanut butter? AWESOME. That’s what happens. A perfect way to spread the love to all your favorite things, including cookies, waffles, sandwiches, and–yes, you guessed it–even Oreos.

Oreo-Stuffed Chocolate Chip CookiesWe’ve all heard about them. You’ll just have to try them to believe it. ‘Nuff ‘stuff said.

Killer Cookies 'N Cream Brookies 23--112113

Oreo Butter 5--112113

Don’t forget to check out the online bake sale on Monday, 11/25/13! Thank you!

Killer Cookies 'N Cream Brookies 27--112113

Love,

Ala

Killer Cookies ‘N Cream Brookies
Yield: 1 9×9-inch baking pan; 16 large squares
For Insanely Fudgy Gooey Brownie Layer: (this recipe is my own creation but was inspired by a mix of Allrecipes, Smitten Kitchen, and Something Swanky brownie recipes–thanks!_
Ingredients:
  • 8 tablespoons butter or margarine, melted
  • 1 cup white sugar
  • 2 eggs, room temperature
  • 1 teaspoon vanilla extract
  • 1/2 cup all-purpose flour
  • 1/2 cup unsweetened cocoa powder
  • 1/4 teaspoon baking soda
  • 1/4 teaspoon salt
  • 1 cup chocolate chips or chunks
  • 16 whole Oreos

Directions:

  1. In a large mixing bowl, cream together melted butter and sugar until sugar is completely dissolved.
  2. Beat in eggs and vanilla.
  3. Gently mix in flour, cocoa powder, baking soda, and salt until just incorporated.
  4. Fold in chocolate chips.
  5. Reserve whole Oreos for assembly (see instructions below)
For Cookies ‘N Cream Cookie Bars:
Slightly adapted from Picky Palate‘s wonderful recipe
Ingredients:
  • 1/2 cup butter or margarine, softened
  • 1/2 cup white sugar
  • 1/2 cup packed brown sugar (I used dark)
  • 1 egg
  • 1 teaspoon vanilla extract
  • 1 1/2 cups all-purpose flour
  • 1/2 teaspoon baking soda
  • 1/2 teaspoon salt
  • 1/2 cup white chocolate chips
  • 1/2 cup semi-sweet or milk chocolate chips
  • Approximately 14 Oreos, roughly chopped

Directions:

  1. In a large mixing bowl, cream together butter and both sugars until light and fluffy, approximately 2 minutes of strong creaming.
  2. Beat in egg and vanilla.
  3. Add flour, baking soda, and salt. Mix in until just incorporated.
  4. Gently fold in both chocolate chips and chopped Oreos.

To Assemble Your Killer Brookies:

  1. Preheat oven to 350 degrees F. Line a 9-inch square baking pan with lightly greased foil.
  2. Pour brownie batter into baking pan. Spread evenly.
  3. Top with 16 evenly-spaced whole Oreos.
  4. Drop cookie dough evenly over the layer of Oreos. Spread dough gently so that it covers the entire top of the pan.
  5. Bake in preheated oven for 27-32 minutes, or until a toothpick inserted comes out clean and your cookie layer looks slightly crispy (it should be a golden brown color) but is not yet overbaked.
  6. Allow to cool at least 30 minutes in pan before cutting and serving.

Oreo “Butter”

Ingredients:

  • Approximately 20 Oreo cookies, coarsely chopped/crushed
  • 1/2 cup peanut butter
  • 1/3 cup white chocolate

Directions:

  1. Place Oreos in a food processor and grind them until they achieve a crumb consistency.
  2. Add peanut butter and white chocolate. Continue processing for another 5-7 minutes; the time will depend on the power of your food processor. Your Oreo spread will clump up at first, but as you continue processing it will begin to turn into a gritty paste, and then slowly turn into a much smoother, almost liquid-like spread.
  3. Store your Oreo butter in a jar at room temperature. Spread it on anything and everything (waffles, crackers, sandwiches, more cookies–the possibilities are endless)!
Will Cook For SmilesTuesday Talent Show Link Party at Chef in Training! It is held weekly and has some amazing link ups!

1

6 Comments

Filed under Baked Goods and Desserts, Bars, Brownies & Chocolates, Dips/Spreads

Roasted Pepper Sweet Potato Feta Dip

Before you read this. Yes, before.

Well, okay–maybe after you read. And maybe after you try making this really, really creamy light dip. But right after.

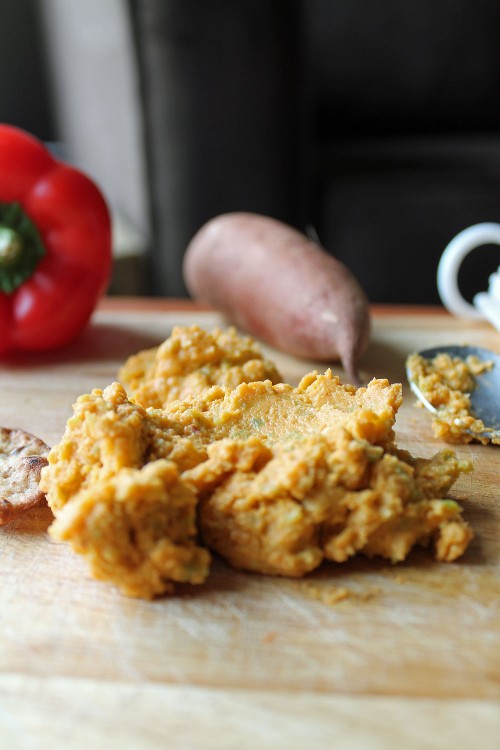
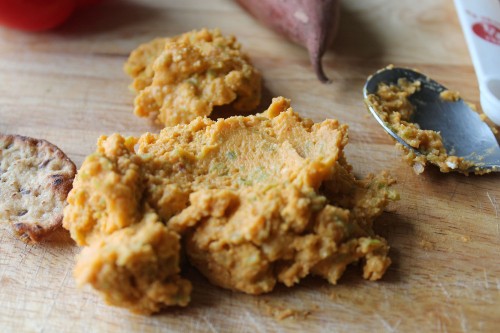
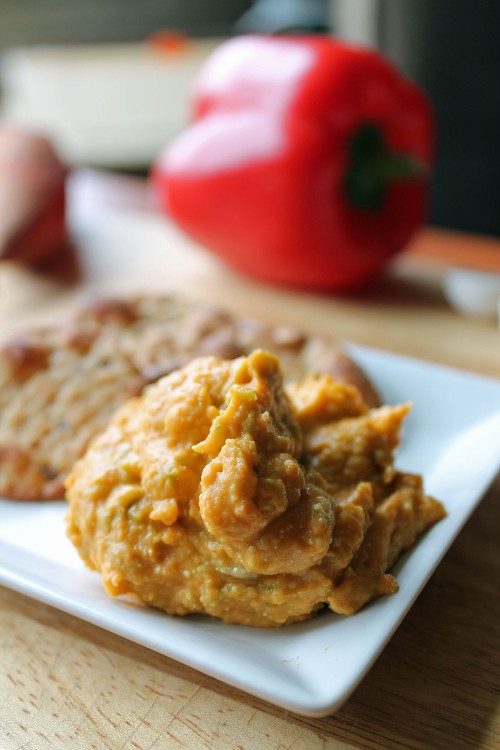
Roasted Pepper and Sweet Potato Feta Dip 2--012413

I want you all to get your flu shot.

Grab your loved ones and get them their flu shots, too.

Roasted Pepper and Sweet Potato Feta Dip 9--012413

If you’ve all been wondering where the hoozers I’ve been for the past 13 days, I’m just going to close my eyes and repeat…

Get. Your. Flu. Shot. PEOPLE. Seriously.

And please, don’t lick the spoon if you’ve got the flu (like I did) and are in the kitchen cooking for more than one (which I wasn’t, thankfully–I could barely take care of myself as it was). Maybe nobody else can see you, but the karma gods can. And they’ve got their eyes fixed on you like a daddy’s got his eyes on his daughter’s prom date.

<<Death glare.>>

Roasted Pepper and Sweet Potato Feta Dip 11--012413

Whizzing past all the far-too-graphic details with which I could regale you about my one-week sojourn in bed, however, I’d like to move on to the very important matter of…this dip. But this begs a slight digression first.

The worst part about the flu, aside from the massive fever and world-tilting-off-its-axis feeling every time you stand up, is the tummy aspect. This is my kind, euphemistic way of telling you that my toilet bowl and I became bestest buddies this week.

Yeah. Unfun, i.e. (according to our reliable friend Urban Dictionary), “the evil opposite of fun.”

Roasted Pepper and Sweet Potato Feta Dip 6--012413

Roasted Pepper and Sweet Potato Feta Dip 15--012413

Do you ever get that terrible feeling when you’re sick of being extremely hungry, but wanting absolutely nothing to do with food?

That defined the entirety of the first 72 hours of my flu.

Roasted Pepper and Sweet Potato Feta Dip 14--012413

For the next leg of 72 hours (the second trimester, if you will–because yes, 9 days of the flu feels as arduous and taxing as an entire pregnancy, right), I ate little nibbles here and there between racking hacking fits. Still wasn’t hungry, but I could at least stomach some sustenance.

And then came the final trimester. Talk about pregnant lady status.

I went through more food than I usually eat in a week. Every. Single. Day.

No joke. Think I’m joking? Well…well, no. I’m not.Ask the dishes. Maybe they’ll talk to you like they did to me while I had a fever.

Roasted Pepper and Sweet Potato Feta Dip 7--012413

So I ate myself out of house, home, and body. The funny part was not feeling at all bloated or heavy afterwards; guess my body really wanted to make up for the fact that it didn’t get any food for basically 6 days.

So here comes the good part: In my book, when you’re eating at the daily rate of a grown hippopotamus, and when you’re able to stand for 10 minutes without toppling over like a Jenga set played by drunkards, welllll–

It’s grocery shopping time!

Peppers, yams, feta–you saw it, I snatched it up first and bought that bad baby.

Then I came home and made this dip and felt really proud of myself.

Roasted Pepper and Sweet Potato Feta Dip 13--012413

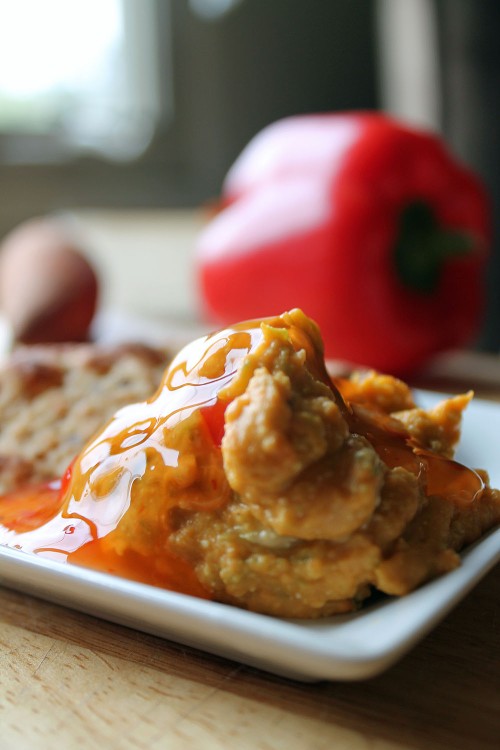
And then I tried the dip and–lordie lordie. Talk about a fireworks show of spice, sweet, and just the perfect amount of tang.

Hallelujah for stomachs!

Hallelujah for appetites!

Hallelujah for sweet, tangy dips with a kick!

And freakin’ hallelujah for the medical advances that will keep you from going through the same Homeric epic of misery that I went through!

(That’s your cue, people–make this recipe, then skedaddle out there and get your flu shots!)

 Roasted Pepper and Sweet Potato Feta Dip 3--012413

Ala

Have you been staying healthy this flu season?

What are your favorite flu remedies and recipes?

 
Roasted Pepper Sweet Potato Feta Dip
Ingredients:
  • 1/2 green or red bell pepper
  • 1 small yam, baked until soft and peeled
  • 1.5 oz. feta cheese (I used herbed feta cheese)
  • 2 tablespoons plain Greek yogurt
  • 1 tablespoon lemon juice
  • 1 teaspoon olive oil
  • 1/2 teaspoon crushed red pepper flakes (adjust to taste)
  • Dash of salt (adjust to taste)
  • Sweet chili sauce (optional–I used Trader Joe’s brand)

Directions:

  1. Preheat the broiler in your oven. Deseed pepper and place it, skin-side up, under heated broiler and cook until skin is blistered and blackened. (It took mine about 5 minutes to blacken completely, with two rotations in between.) Remove pepper carefully from broiler with tongs and wait for it to cool briefly. Quickly pull off and discard the thin blistered skin.
  2. Place all ingredients into food processor and process for 30-60 seconds at 15-second intervals. Add extra red pepper flakes and salt to taste. Drizzle with sweet chili sauce for an added tangy kick!
  3. Serve dip with raw vegetables, bread, or pita chips. Enjoy and stay super healthy, folks!

13 Comments

Filed under Dips/Spreads

Carrot Cucumber Nut Yogurt Dip (Revved-Up Tzatziki)

Oh, you’ll want to bookmark this one. Trust me.

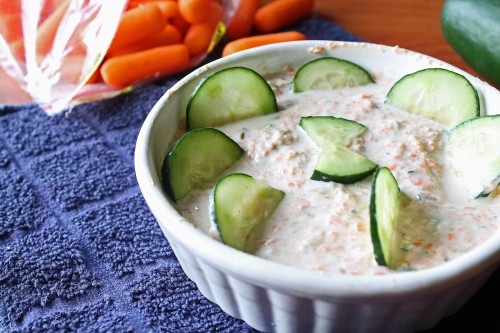
Carrot Cucumber and Nut Yogurt Dip 2--010713

Don’t believe me? Ask the dishes…

Or you can take my word for it. Because the dishes are empty.

Empty.

As in dang-that-was-a-finger-lickin’-amazing-tzatziki empty.

Carrot Cucumber and Nut Yogurt Dip 5--010713

You’re welcome.

Don’t worry, your jeans will thank me for this one as well. See this dip? No? Maybe we should get a closer look…

Carrot Cucumber and Nut Yogurt Dip 7--010713

Yeah.

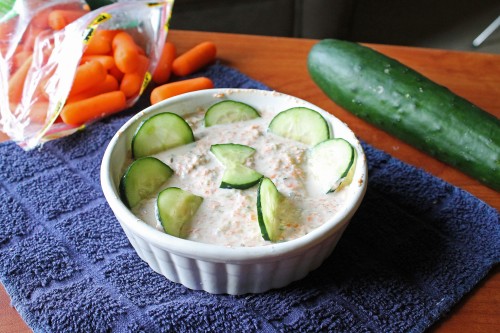
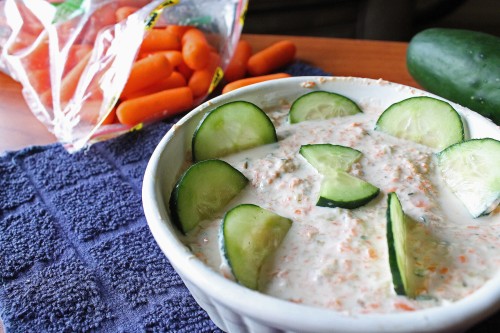
That’s your new year’s resolution in a dish calling out your name. Made with non-fat Greek yogurt, carrots, cucumbers, toasted walnuts, honey, and just a tiny (think miniscule!) smidge of mayo, this dip is for not for your waistline to die for.

Your sense of self-restraint might die for it, but I speak from personal experience when I say that tossing your self-restraint out the Paladinian window (okay, my apartment doesn’t actually have a Paladinian window, but would you crush a gal’s dreams now?) isn’t such a bad thing here. In fact, it’s a very good thing. Because instead of snacking on that towering pile of leftover lemon cheesecake and caramel flan from the new year’s party, you’ll be asking for someone to hand over the cucumbers.

Carrot Cucumber and Nut Yogurt Dip 3--010713

I’m a devoted fan of tzatziki, but the tartness of it gets old after a while, so I decided to infuse my usual recipe with a bit of cool (and colorful!) kick. Instead of just the usual cucumber dealio, I tossed in some toasted walnuts (which added, as you might expect, a great nutty dimension), a smidge of honey and mayo (for a sweet, creamy contrast to the tang), and finely-cut carrots (great for added texture).

Carrot Cucumber and Nut Yogurt Dip 6--010713

Yes, you may thank me now.

Or better yet, you may thank me after I’ve had another dish of this. If you’d like to make me one and find a way to ship it by express mail, I won’t object to that form of a thank-you gift, either.

Carrot Cucumber and Nut Yogurt Dip 1--010713

While everyone else (and I sadly include myself in this woebegone category) is busy resolving to shed a few of those holiday pounds during these mad first weeks of the year, you can just hum-dee-ding along with this dip. Grab the nearest fresh veggie and dip away!

You could also try dipping the lemon cheesecake. That’s a…fruit, right?

Speaking of veggies, today was the first day of classes, and when I went up to introduce myself as the TA our professor had us name our favorite vegetable. I said the following three sentences, recorded verbatim:

“I don’t have a favorite vegetable.”

“Actually, I like all vegetables.”

“…Ice cream should be a vegetable, does ice cream count?”

Carrot Cucumber and Nut Yogurt Dip 8--010713

Not one of my shining moments teaching.

At least they laughed.

Anyway.

Make this. You’ll like vegetables, you’ll like your jeans, and you’ll like me for it.

Everybody wins–except maybe Jenny Craig.

Happy week 2 of 2013!

Ala

Carrot Cucumber Nut Yogurt Dip (Revved-Up Tzatziki)
Serving: 1 medium-sized dish for dipping
Ingredients:
  • 1/2 medium cucumber, chopped
  • 8 oz. plain Greek yogurt
  • 2 tbsp honey
  • 1 tbsp mayonnaise
  • 1/4 cup walnuts (or your preferred nut), chopped
  • 1/2 carrot or approximately 10 baby carrots, finely chopped (I pulsed mine a few times in the food processor)
  • Salt and pepper, to taste

Directions:

  1. In a small bowl, cover the chopped cucumber with salt. Allow to absorb for 30 minutes (doing so will suck out the excess water in the cucumber, which will make the dip too runny). Pour out excess water, then pat cucumber dry with a paper towel and set aside.
  2. In a medium-size serving dish or bowl, combine yogurt, honey, and mayonnaise. Fold in cucumbers, nuts, and carrots. Add salt and pepper to taste.
  3. Serve with your favorite raw veggies, fruit, or lemon cheesecake. (Just kidding about the cheesecake!)

4 Comments

Filed under Dips/Spreads

Black Sesame Tahini Hummus

“He bent down and pulled his wand out of the troll’s nose. It was covered in what looked like lumpy grey glue.

Harry Potter and the Philosopher’s Stone

I don’t know about you, but when it comes to funny-looking foods at my dinner table, I have a hard time keeping my imagination in check.

So when I peeked into my fridge this afternoon and noticed the woeful lack of Trader Joe’s Mediterranean hummus inside, and when I made up my mind right there that I was going to whip up my own batch of hummus with what I had on hand–black sesame seeds for tahini instead of regular white ones–you don’t need a vivid imagination like mine to imagine what happened next.

Flour Power: Making your own hummus, nut butter, or cookie butter from scratch helps you and your family avoid all those pesky preservatives lining your local store shelves. Plus, it’s a cinch! All you need are a few key ingredients, a food processor, and an active sense of adventure!

You can probably see where this discussion is headed. If you’re faint of stomach (don’t worry, I won’t go into anything actually explicit!), you might want to consider jumping to the recipe and forgetting the rest of this post ever happened. Yeah?

Still with me? Okay, here it is…

Troll bogeys.

Okay, there. I said it.

Looking at this black sesame tahini hummus, that was the first thought that popped into my mind.

It’s delicious troll bogeys, though! And the hummus doesn’t actually look like a grey lump of glue–it actually looks, feels, and tastes like your average hummus…only gray.

You can eat it with anything you like–fruit, veggies, cookie butter (okay, maybe not cookie butter, but I do have a great granola recipe to share with you guys soon that you can use it in!). It’s really just your average Joe hummus, except the roasted black sesame tahini adds a nice nutty kick to the flavor. This is what happens when your pocketbook is on a starvation regimen light diet and you can only afford to scour the Asian markets once in a blue moon and have to buy your black sesame seeds in bulk.

Good things! Good things like this hummus happen.

And you thought the life of a poor, underfunded grad student with crazy teaching hours and next to no livable resources was tough. Pffffft.

Funflour Fact #2: Avast ye, mateys! Did you know September 19th is International Talk like a Pirate Day? Arrr! Grab yer parrots and get them swash-buckling scallywags, landlubbers! (And fer more pirate talk, be scuttling on over to this fun website!

What kind of grad students do you know?

We’re as happy as larks.

Eating raw food.

Not because it’s “healthy” or “cleansing,” but because that’s what we can do. It’s about all we can do, really. Did I mention that the zoo keepers at the zoo where I worked for five years brought monkey chow home to eat for breakfast and lunch because they couldn’t afford to pay tuition while keeping? Thank goodness I haven’t been reduced to that yet. I would never do something that desperate, ever.

That’s probably just because the grad department doesn’t have its own set of in-residence monkeys, though. Otherwise, I’d be all over that chow.

Just kidding! I have this delicious hummus sitting in my fridge, and you should clear out a space out for it in yours, too!

What are some weird food associations that you make?

Black Sesame Tahini Hummus
Yield: Approximately 1.5 cups
Ingredients:
  • 1/3 cup black sesame seeds
  • 1/4 cup canola oil
  • 1 (15 oz.) can garbanzo beans, drained
  • 3-5 tablespoons lemon juice, adjusted to taste
  • 1 teaspoon garlic salt
  • 2 teaspoons ground cumin
  • Pinch of pepper
Directions:
  1. Heat oven to 350 degrees F. Spread black sesame seeds on a foil-lined baking sheet and place in preheated oven. Toast for 7-9 minutes, until fragrant. (Note: Be careful–black sesame seeds burn easily! Their dark color makes it difficult to tell by any sense other than smell, so make sure you check on them frequently.) Remove from oven and place in food processor.
  2. Add oil to food processor and secure lid. Process for 3-5 minutes, until mixture reaches a liquid consistency. Now that you have your tahini ready, add the remaining ingredients (starting with 3 tablespoons lemon juice) and process until completely smooth, scraping down the sides as necessary. At this stage, you can add additional lemon juice and/or oil as necessary to reach desired taste and consistency.
  3. Serve with your favorite Halloween fare (remember the trolls!) or just whatever food strikes your fancy, including raw veggies and fruit.

6 Comments

Filed under Dips/Spreads

Honey Peanut Butter

How many of you have ever grabbed a spoon, dunked it in an obliging jar of peanut butter, and called the rest history? Anyone?

I would raise my hand, but it’s busy alternately typing and scooping up yet another spoonful of this creamy homemade honey peanut butter. Think I’m lying? Try me.

Wait, no. You can try me in about ten minutes, when I’ve stopped eating this addicting nut butter and washed my hands. Then you can try me.

While you’re waiting for me to get my gunky fingers licked clean, I want to tell you about LACMA, the Los Angeles County Museum of Art. My friend from Berkeley was visiting this weekend, and we randomly came across the most amazing and unexpected thing! Well, not the most amazing (Disneyland has that superlative covered, thank you very much) or most unexpected (it was a museum of, er, art, after all), but it was a close one. 

It was Magritte’s famous picture: The Treachery of Images, also known by its caption, Ceci n’est pas une pipe (or “This is not a pipe”).

I stood in front of this picture for at least five minutes. Pretty neat to think about though, huh? I’ve always loved studying ideas of representation and deconstruction, so this painting is right up my alley. (Wikipedia has some cool stuff to say about it, too.)

I remember seeing the Mona Lisa for the first time in seventh grade and feeling really, really underwhelmed. Not so with my dear friend Magritte!

Yet another A-list hard-hitter was the original Andy Warhol tomato can series exhibit. I don’t know why I didn’t expect this stuff in a huge museum of art, but I was pretty much floored when I suddenly found myself nose-to-nose with the paintings, which were hanging there just like everything else. Unassuming, but oh-so rich!

And of course, I had to do my own artsy rendition before I left:

We also went shmucking around some of the high-end stores in Santa Monica that morning, looking for cute, artsy, and essentially useless (but did I mention incredibly cute?) items in the stores.

I was seriously tempted by this mug because of its truth value:

In the new Target they’ve built in our area (probably the only perk of living in a college town that wholeheartedly supports corporate enterprises), they had these cute signs, too:

Of course, after looking at the price tag for all of this stuff, I decided to go with the bulk-package box of peanuts for my new mini-sized homemade processor. You know, the one that I’m deathly afraid of. Because of its massive blade and capacity to pull a Queen of Hearts execution on me at any moment. That food processor.

Thankfully for this blog, I’m really good at conquering my fears. I once fought off the ants invading my apartment bedroom all by myself, even though I’ve never purposely killed an ant in my life. And even though I cried like a baby after I killed one I found crawling on my bedside table, and even though I only killed it because somehow I had accidentally squashed part of it and it looked like it would have been in terrible pain. And even though I had to use a spray can of Raid to get rid of the ant line and cried after that, too. And even though I only sucked it up and did this because my dad threatened to fly all the way down to do it for me if I couldn’t.

Yeah, I’m really brave. I’d give Merida a run for her money, for sure.

But back to peanut butter. Right.

This stuff is insanely easy to make. No food processor fears here! Even for a huge wimp like me.

Happy reading, and happy eatings!

Honey Peanut Butter

Ingredients:

  • 2 cups peanuts, salted and/or honey-roasted
  • 1 tablespoon honey (if peanuts are not honey-roasted)

Directions:

  1. Pour peanuts into food processor; lock the lid and machine into place. Grind for approximately 8-10 minutes total, allowing your food processor to rest every 30 seconds or so. Throughout the grinding process, your peanuts should go from finely crushed, to an oily paste, to a larger clump, and then to a creamy and smooth nut butter consistency.
  2. When your peanut butter is creamy and almost liquidly, remove it from processor. Stir in honey quickly.
  3. Serve with anything!

8 Comments

Filed under Dips/Spreads

Creamy Homemade Cookie Butter

So I have a fun news update and a confession.

News: I got a brand spankin’ new mini food processor as an early birthday present that I’m over the moon in love with.

Confession: I’m kind of scared of it. Like, kind of really scared.

Apparently only 50 to 70 people get  wounded in shark attacks every year.

Meanwhile, with a food processor, you have a mean, angry blade sitting in front of you. It’s got that machine drive, literally. All that separates you from that whirring 100 rpm blade is a thin sheet of plastic that you’re betting big bucks on to hold its weight. It doesn’t have feelings. Once it starts, there’s no stopping it.

I mean, unless you take your finger off the grind button. I guess that’s one good way of stopping it. Better than trying to stop a shark attack from happening, anyway.

But that doesn’t stop me from being just the tiniest, slightest bit scared of it. Do you still remember your first time using a food processor? I don’t know about you, but now that I’m technically a “grown-up” (imagine that in BIG scare quotes), my fear senses have skyrocketed and my fear tolerance quota has exponentially shrunk. So fear is most definitely present as I press the grind button and then experience that moment of panic where I wonder whether or not I remembered to screw on the cap correctly–and whether it even matters at this point.

This is, of course, a completely irrational and unwarranted fear. The number of deaths by food processor every year are probably about the same as the number of deaths by bunny attack. I.e., zero.

I had to overcome this serious fear today when I peeked into my cupboard and found, to my eternal dismay, that we were all out of Trader Joe’s cookie butter! For a product that I tasted for the first time only two weeks ago, cookie butter–also known as speculoos spread or Biscoff spread–has me in its tight, cinnamony, gingersnappish clutches. Not that this is a bad thing. In fact, I’m even vaguely convinced that it’s probably a very good thing for the western hemisphere to have been introduced to cookie butter via our very good friend, Joe. I love you, Joe. I love you, Cookie Butter.

Yes, I’m aware that we have a very dysfunctional relationship. Go away. Or better yet, go to the kitchen, try this recipe, and then you can come back and make fun of me only when you have successfully repelled the irresistible taste of homemade cookie butter.

But you won’t. You’ll just be sitting there in the kitchen with a spoon in one hand and a butter knife in the other. The spoon is for scooping the cookie butter and eating it in indecent measure; the butter knife is for warding off any potential thieves.

Give it a try–I’d love to hear what you all think! There are plenty of homemade cookie butter recipes on the web, but this is by far one of the most simple. All you need are some gingersnaps, a few side ingredients you’ll probably have on your shelf anyway, a food processor, and more courage than the Cowardly Lion has.

When you’re done, don’t forget it to make it your own! See?

What would you love to see made with cookie butter? Send ideas my way, and I’ll see if I can’t whip them up! As long as this cookie butter craze lasts–and it’s looking like a keeper–I’ll be on the lookout for excuses to make some more of this scrumptious spread.

Happy reading, and happy eatings!

Creamy Homemade Cookie Butter

Ingredients:

  • 15 gingersnaps, broken into smaller pieces
  • 1/2 cup vegetable oil
  • 1/3 cup powdered sugar
  • 1 teaspoon vanilla extract
  • 1 1/2 teaspoons ground cinnamon

Directions:

  1. Secure your food processor and its lid (as a first-time user, I would have taped mine up if I could have–alas, I settled for donning a really terrified look and chanting prayers under my breath). Grind gingersnaps until they become a fine powder. Add oil as you continue to grind at 10-15 second intervals for about 5 minutes total, or until it reaches a thick liquid consistency.
  2. Add powdered sugar, vanilla, and cinnamon. Process for an additional 1-2 minutes, until cookie butter reaches desired consistency (I process mine until it becomes slightly thinner than peanut butter).
  3. Try not to royally freak out as you reach over to unplug your food processor. Phew–all done! Serve with anything you want, because you deserve it. Waffles, pancakes, bread, gingersnaps, fish (okay, probably not fish), and so forth–anything is fair game!

Step-By-Step Pictorial

Ingredients You’ll Need: Gingersnaps, vanilla, cinnamon, oil, and powdered sugar (not pictured). You’ll also need your scary food processor. Mine’s mini, and I’m still scared.

Grind until gingersnaps turn into fine crumbs.

Add oil and grind until it turns into a thick liquid. Add sugar, vanilla, and cinnamon, then continue grinding for an additional 1-2 minutes. Allow to cool a bit, then serve with whatever strikes your fancy!

11 Comments

Filed under Cookies, Dips/Spreads