Guess who’s sitting in the reading room of a world-reknowned research library…
…writing on her food blog. I’m such a great academic, I know.
At least I don’t text while I’m at Disneyland. You know those rumored labyrinth of tunnels that runs underneath the theme park? I have it on good authority that they actually exist and, what’s more, that that’s where Ursula drags all the people who are texting and performs her “Poor Unfortunate Souls” solo. So that the next time you see them, it’ll be with their fins nailed to the floor singing a mermaid rendition of “It’s a Small World” in the infamous ride.
But really–who pays $100+ to walk into the happiest place on earth, plop down on the nearest bench, and have blase conversations with people hundreds of mile away about the recent film “Looper”?
I mean, it was a good film, bub, but let’s face it–it can wait. And frankly, nobody really cares if you thought there was a major flaw in the time warp logic, because time travel has nothing on JGL’s badass-ness…if that’s a word. It will be in four years when I come out with my doctorate. That’s the first word I’m going to coin. Badassness, read: JGL.
Speaking of acronyms, the world is chock full of acronym-based crazes these days–some great (like DIY) and some not so much (YOLO, anyone?). I’m personally a huge proponent of DIY, not least because:
a) it’s easy on the pocketbook,
b) it’s fresher (if we’re talking about food–I’m not sure whether a homemade sweater is any “fresher” than a store-bought one unless you shear the sheep yourself or something), and
c) it makes you feel like you actually possess some semblance of control over your otherwise untameable destiny.
Flour Power: There are plenty of DIY projects out there that are waiting to be created! If you ever feel blue and need something to do, make something fun and you’ll feel like brand new!
Now, let’s not jump ahead of our horses here. As recently as two years ago, I didn’t see the point of DIY. It contained everything that irked me: an action verb (I was much more of a passive voice kind of gal), an unspecified pronoun, and a much-unneeded reference to the lazy-bummed being I was.
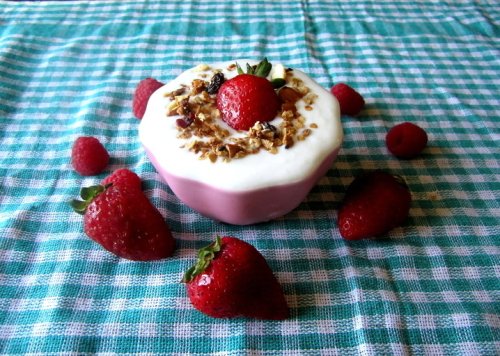
Now, I not only love DIY (even though I always get it mixed up with DUI, much to my own social embarrassment), but I’m even a little bit addicted to it (and the use of dangling pronouns, apparently)! I’ve been making my own granola, ice cream, hummus, pesto, and now, my own yogurt. It’s as easy as two recipes and about 20 minutes in which you can check on the progress of your yogurt over the span of six hours.
DIY: Do-it…yogurt!
Do this. Print it. Save it. You’ll get a bucket full of yogurt and a buck more in your wallet. Plus, homemade yogurt can be tweaked to have a more subtle taste than most biting tart plain yogurts. What’s not to love?
Happy reading, and happy eatings!
Homemade Plain Yogurt
What you’ll need:
- 2 cups milk*
- 3-4 tablespoons plain yogurt**
- A medium pot, a towel, and a warm spot in your kitchen (preferably the oven)
*Note on milk: You can basically use any fat-percentage milk. I use 2%–whole milk would make your yogurt creamier, as expected, while I’m assuming skim milk will make your yogurt a bit thinner. However, don’t feel like you need to use whole milk in order to make great (and guilt-free) yogurt!
**Note on yogurt: It’s VERY important that you check your store-bought yogurt’s ingredients list–if you see “Live and Active Cultures” listed, you’re good to go! If your yogurt brand is missing this ingredient, your yogurt won’t cultivate properly. The type of plain yogurt you use is completely up to you, although I recommend using a nice tart and thick Greek yogurt–the tangy bite of the yogurt will fade a little bit when you make your own (and that’s completely fine with me, since I’m not a huge fan of super-tart yogurt anyway).
Directions:
Step 1: HEAT UP your milk.
Over medium flame, heat up your milk in saucepan until it begins to foam (just before it boils). Your milk will reach a temperature of about 180 degrees F at this point. Allow it to cool for 15 minutes, or until you can comfortably dip a finger in for a few seconds without scalding yourself (for those of you with a thermometer, it’ll be about 110 degrees F).
Step 2: ADD yogurt cultures.
When your milk reaches the desired temperature, stir in 3 to 4 tablespoons of your store-bought yogurt until completely incorporated. I typically use store-bought yogurt as a starter each time just because it yields the most consistent results, but I’ve heard that you can definitely use your own homemade batches as starter.
Step 3: COVER AND KEEP WARM for 6 hours.
Cover the pot with a towel and place the pot in a warm place. I like to heat up my oven briefly and then turn off the heat before placing my yogurt inside the oven. I usually fire it up for a moment every hour or so to keep the temperature stable inside. (Just don’t forget to turn off the oven like I did! If it gets too hot, your yogurt will simply seize and the cultures won’t work anymore.) Allow it to sit inside for about 6 hours, until your yogurt is pretty firm when jiggled lightly. After that, you can eat it straight, but I definitely prefer refrigerating it overnight and anticipating my next morning’s breakfast. Bon appetit!


