Crunchy Cookie Butter Espresso Granola

Crunchy Cookie Butter Espresso Granola 5--010614

If life milestones were potluck dishes, moving would be a crusty dry loaf of fruitcake. I’m sure somebody out there appreciates fruitcake, and likewise I’m sure somebody loves the nonstop hubbub of moving residences. That person is not me. Especially not Studying Me, which tolerates everything at a 50% lower threshold than Normal, Socialized Me.

Crunchy Cookie Butter Espresso Granola 2--010614

In case you missed it previously, here’s the rundown: Studying Me is extremely grateful to her parents, who basically magicked her entire store of belongings into her new apartment this weekend while she guiltily (I mean, really guiltily) shuffled her feet and finished speed-reading Charlie and the Chocolate Factory. Studying Me also LOVES the new place, which has a kitchen that takes up 40% of the apartment and contains 75% of all my belongings. But Studying Me is currently typing this blog post on an unhappy stomach full of emoteating (read: emotionally-induced eating) because apparently she doesn’t cope well with stress, separation, and studying all in one fell swoop. So it’s been 12 whole hours and I’m short half a jar of peanut butter already.

Crunchy Cookie Butter Espresso Granola 9--010614

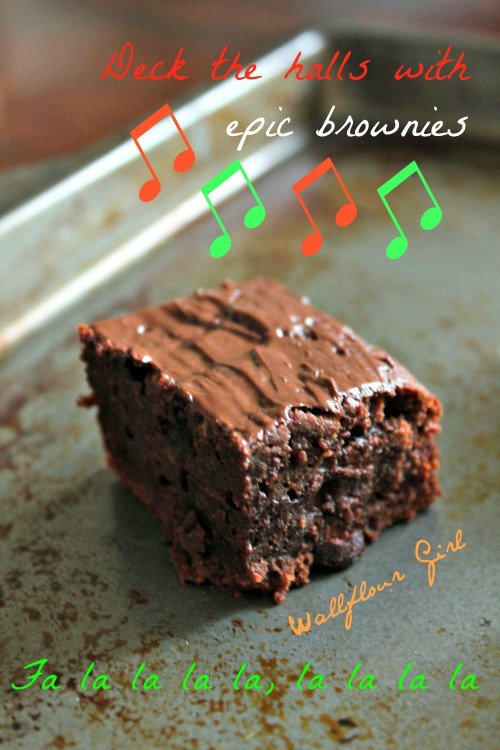
Three hours after leaving, my mom called and asked me how I was doing, and if I was making brownies already. I was not. I was too busy emoteating, writing this post, and wishing really hard for this granola to pop out of my screen a la Willy Wonka’s Television Chocolate Room to make the damn brownies. #yeahwhatjusthappened

Crunchy Cookie Butter Espresso Granola 12--010614

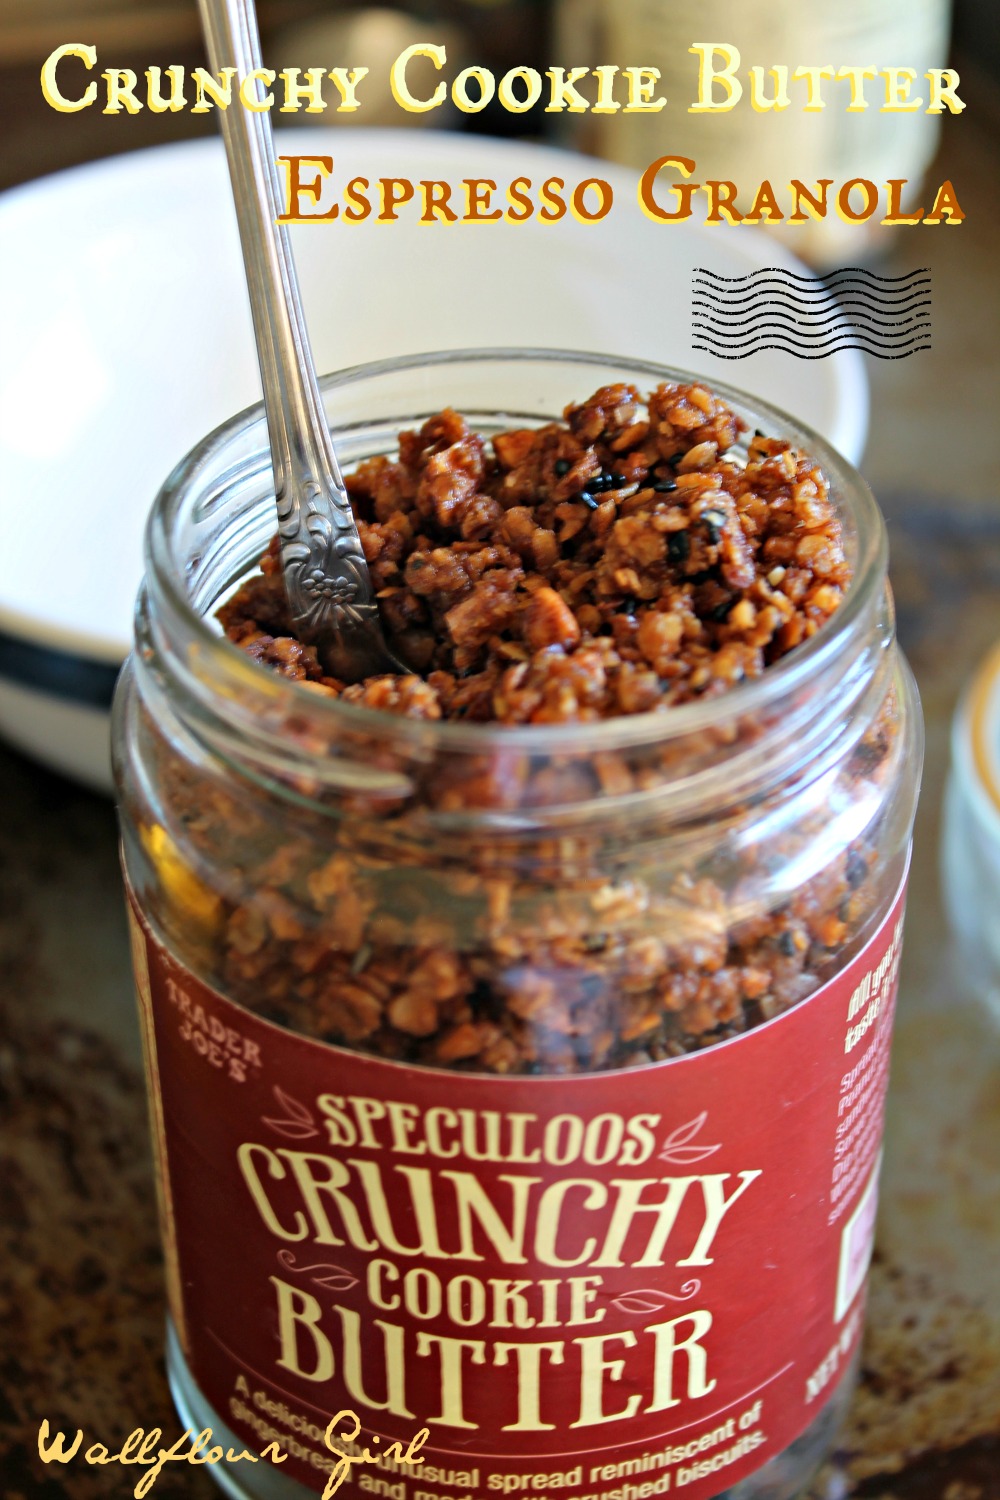
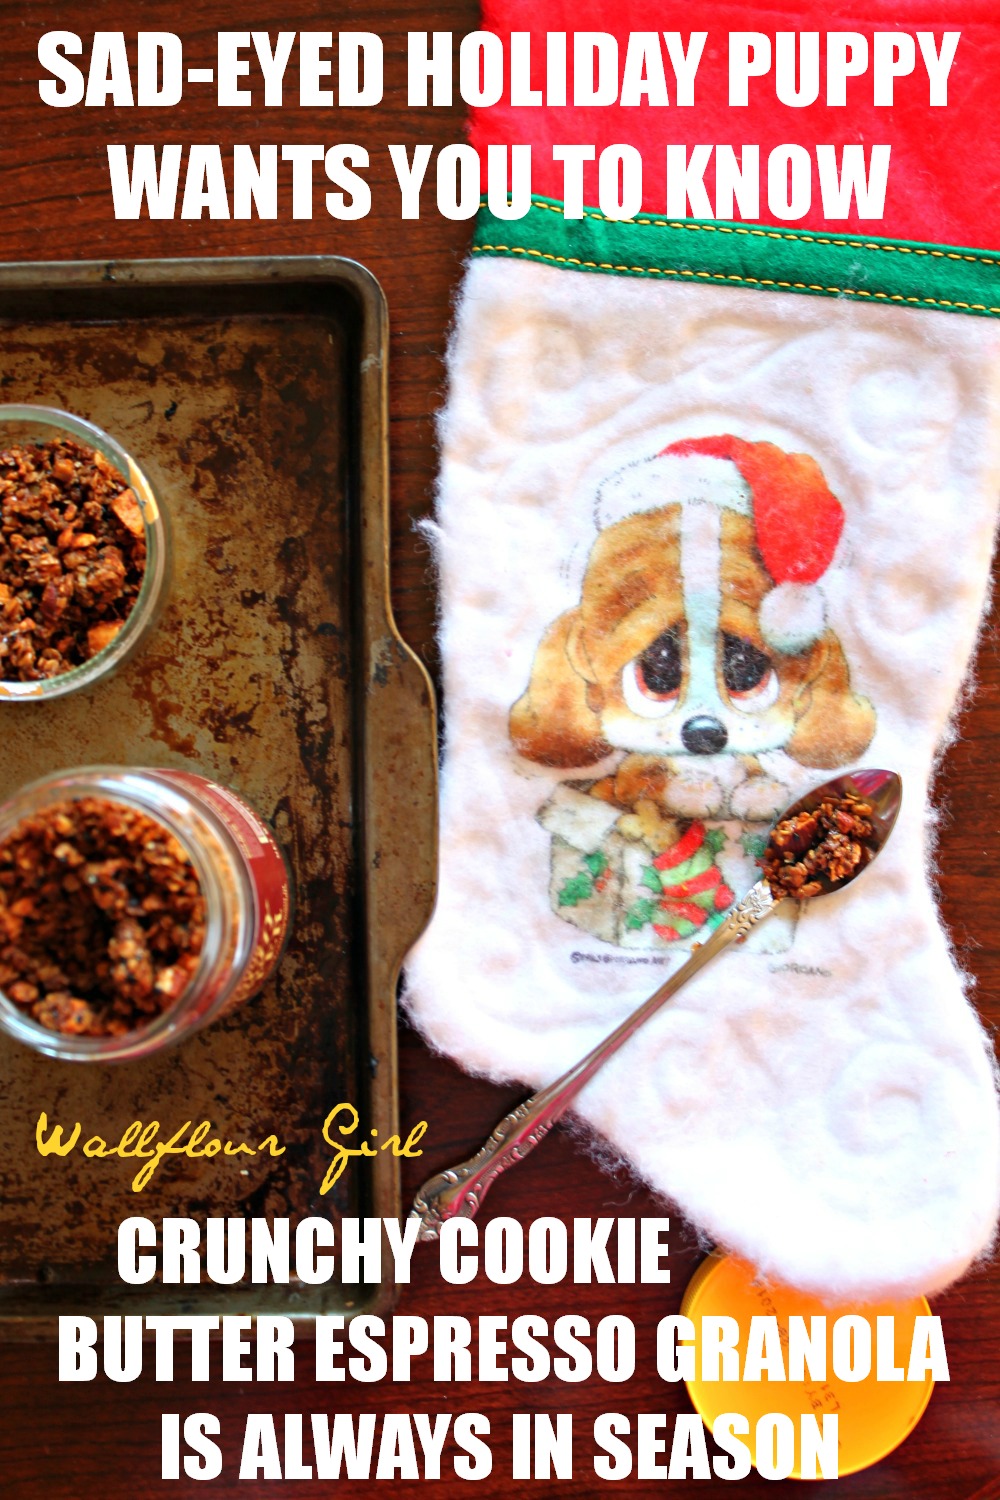
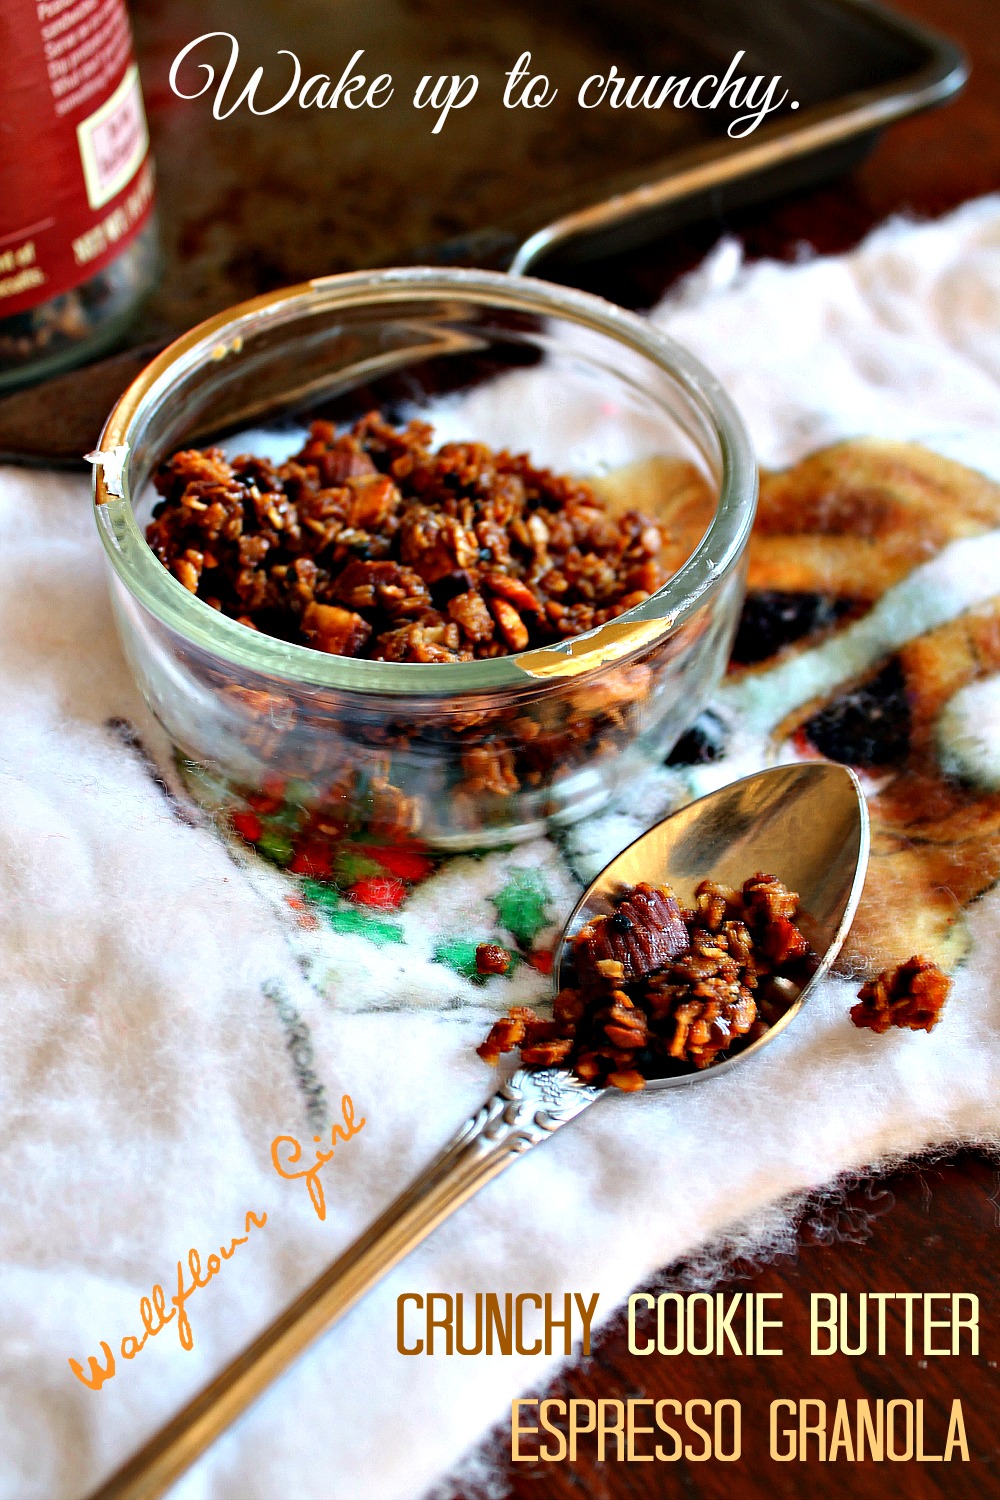
Studying Me and Normal Me both love this brand new, bold King of Crunchiness cookie butter and espresso-flavored granola I invented in my pre-move procrastination. It is insanely crunchy, coffee-y, cookie-y. It is also based on–and probably rivals–the Honey Bunches of Oats Copy-Better Recipe that all of you loved and repinned like mad last year. It’s the perfect breakfast-on-the-go food in a smokier, sexier, adult-ier kind of way. Not that I know anything about what being adult-ier entails, since I am currently sitting on the floor of my next-to-bare apartment floor and lolling next to my laptop with as much motivation to do anything as a tranquilized rhinoceros might have.

Crunchy Cookie Butter Espresso Granola 15--010614

You can use your imagination to figure out what that even means. Or you could put your time to better use and print this awesome recipe, make it, and send it to

Yours truly, and slightly deranged, but surely in her right mind taste buds,

Ala

P.S. If you’ve noticed an onslaught of “Start the New Year Right” and Skinny Recipes for 2014! collections on your news feed lately: Never fear, I’m ready to ruin that for all of you with some fabulously buttered-up sweets in my next few posts. Cheerios!

Crunchy Cookie Butter Espresso Granola
Ingredients:
  • 3 1/2 cups quick-cooking oats
  • 1/2 cup almonds or preferred nut, chopped
  • 1/3 cup black sesame seeds (optional)
  • 3/4 cups brown sugar
  • 1/4 cup strong brewed coffee
  • 1/4 cup vegetable or canola oil
  • 1/4 cup maple or pancake syrup
  • 1/4 cup cookie butter (homemade or store-bought)
  • 3 tablespoons cocoa powder
  • 1 teaspoon vanilla extract
  • 2 teaspoons cinnamon

Directions:

  1. Preheat oven to 300 degrees F. Lightly grease a 9×13-inch baking pan (or whatever large size baking pan you have available–enough to fit 3 1/2 cups of oats in an even layer no more than two inches thick). Pour oats, chopped nuts, and black sesame seeds (if you have them) into prepared pan.
  2. In a medium saucepan, heat brown sugar and brewed coffee until it just begins to boil. Turn off heat, then stir in oil, syrup, cookie butter, cocoa powder, vanilla, and cinnamon. Pour over oats mixture and stir until all of the oats are evenly coated. Pat oats evenly into bottom of pan so that the layer is no more than two inches thick. (This will help your granola achieve optimal crispiness!)
  3. Bake in preheated oven for 40-50 minutes (stirring every 15 minutes), or until toasted and a dark golden brown. Remove from oven and allow to cool completely in pan before crumbling. Store in an airtight container.

Tuesday Talent Show Link Party at Chef in Training! It is held weekly and has some amazing link ups!cast_party_button

Will Cook For Smiles

link party

4 Comments

Filed under Breakfast & Brunch, Snacks

Top Wallflour Picks of 2013

No pansy dandy flower picking this New Year’s Eve–it’s all (wall)flour picking here! As the clocks count down (or have counted down already, as the case might be–we’re still a few hours away from midnight!), I’m sure your online readers are simply drowning in “2013 in review” posts…but you won’t find a better bunch of addicting, crowd-pleasing, most-requested “Top 13 Wallflour Picks of 2013” anywhere else! And if you’re looking for a way to ring in the new year right, you might want to try your hand at these friend-family-and-stranger-tested goodies first.

Before you do, though, I just wanted to say a HUGE THANK YOU to everyone for their comments, reading, and (most importantly) support this year. It has been an insane 2013 (which is such an understatement, it almost feels like a lie), what with exam studying and work and more studying and expanding my blog–and I appreciate every one of you! Wallflour Girl as a blog has been growing like dandelions in untilled soil–er, with more love though, I hope!–in the past 4 months in particular. Thank you for all of the Pinterest repins, Facebook likes, linkbacks, and features on major food photography sites such as Foodgawker, Tastespotting, and Tasteologie ❤ I couldn’t do it without you. Hope to see you all again on the sunny side of 2014! Don’t be shy, just say hi 🙂

13. Best Breakfast for Champions Award: CLASSY OVERNIGHT BLUEBERRY FRENCH TOAST

Blueberry Hawaiian Sweet Bread Toast 5--012713

12. Best Care Package Item Award: CREAMY DREAMY OREO CHEESECAKE SWIRL COOKIES

Creamy Dreamy Oreo Cheesecake Swirl Cookies 12--090613

11. Best Icing Award: HEALTHY APPLE SPICE BARS WITH CARAMEL PENUCHE ICING

Healthy Apple Spice Squares with Caramel Penuche Icing 1--022613

10. Richest ‘Wow’ Dessert Award: INSANELY FUDGY DECONSTRUCTED TWIX BROWNIES

Insanely Fudgy Deconstructed Twix Brownies 9--11013

9. Lookin’ Fancy-Shmancy Pants at a Potluck Award: ITALIAN CREAM LAYER CAKE

Italian Cream Cake 10--110613

8. Best Chocolate Lovers’ Dessert Award: FUDGY CHOCOLATE TUNNEL CAKE

Fudgy Chocolate Tunnel Cake 1--060813

7. Most Ridiculous(ly Addicting) Dessert Award: SLUTTY CHEESECAKE BARS

Slutty Cheesecake Bars 1--051913

6. The MOM Award: THE AMAZING ‘UN-RELATIONSHIP’ CHOCOLATE CHIP COOKIE

The Amazing 'Un-Relationship' Chocolate Chip Cookie--14--111413

5. Best Brownie Ever Award: EPIC DULCE DE LECHE BROWNIES

Epic Dulce De Leche Brownies 17--112913

4. Most Popular Cookie Award: BEST BISCOFF CHOCOLATE CHIP COOKIES

Best Biscoff Chocolate Chip Cookies 1--061913

3. Best Granola Recipe Award: VANISHING GRANOLA (HONEY BUNCHES OF OATS COPYBETTER RECIPE)

Vanishing Granola 1--052413

2. Best Bar Cookie: BEST CHEWY BISCOFF (COOKIE BUTTER) CHOCOLATE CHIP BLONDIES

Best Chewy Biscoff Chocolate Chip Blondies 26--091713

1. Most Requested Recipe: THE VERY BEST TIRAMISU

BEST Tiramisu from America's Test Kitchen 1--101913

Thank you everyone for reading–see you in a wonderful new 2014!

Ala

4 Comments

Filed under Baked Goods and Desserts

No-Molasses Gingerbread Cutout Cookies

With Christmas officially behind us, the mad rush to clear Target’s 90% Off shelves in full swing, and 2014 lurking like a hungry panther right around the corner, one question has been ringing even louder than all the choruses of Jingle Bells and Batman Smells this year. The question: What holiday?”

No-Molasses Gingerbread Cutout Cookies 2--122413

Of course, I’m biased. Who isn’t? The skull-crushing exam for which I am supposed to be productibaking is a whopping 90 days away, in the gloom of which I am packing, applying for fellowships, trying not to lose it as my parents pack for me, studying, unpacking, repacking, despairing, and then making like a really badly-done Loreal commercial: rinse, lather, repeat. 

No-Molasses Gingerbread Cutout Cookies 5--122413

Oh, and my mom thinks I’ve officially gone insane with the amount of baking I’m doing these days. This may or may not be an accurate reflection of my mental well-being right now, but somehow the holidays don’t sound quite as cheery when you’re belting out “DECK THE HALLS WITH BOUGHS OF CRAZY” at the top of your voice.

No-Molasses Gingerbread Cutout Cookies 8--122413

So. For the next 90 days or so, I may not be posting quite as much as I’d like to–but this may or may not be better for all of us. I’m not sure the internet needs another resident village idiot who spends her spare what-in-holy-heck-is-spare-time watching and reposting adorable baby animal memes like this Ocelot/Ocelittle and ridiculous Frozen gifs like this one (which just makes me hungry for pizza and other things I shouldn’t be eating right now, or so my post-Christmas thighs tell me). Or totally overthinking the fact that I am definitely the person sitting at the top of the seesaw in my precarious email correspondences of unequal power dynamics.

No-Molasses Gingerbread Cutout Cookies 11--122413

What I really need right now is a giant T-Rex who will love me. And then one of these amazingly easy, no-molasses gingerbread cookies to remind me that every day deserves to be a holiday.

No-Molasses Gingerbread Cutout Cookies 14--122413

I never keep molasses around the house, plain and simple. I don’t know what it is about molasses that scares me. I mean, it doesn’t scare me. But I never grew up with it, and I’ve never seen any reason to buy an entire whopping jug just so I can make gingerbread cookies one time throughout the year.

No-Molasses Gingerbread Cutout Cookies 17--122413

If you’re like me and don’t hang around with the slowpokes (molasses–get it?), or if you’ve just happen to run out of molasses this season after going on a gingerbread house making binge: no problem. These should really be called no-problem gingerbread cookies because they are so forgiving, even a kitchen novice can make professional-looking and tasting cutout cookies that you can decorate with friends & family into the wee hours of 2014.

No-Molasses Gingerbread Cutout Cookies 20--122413

The secret? Instant butterscotch pudding mix. Wait! If you don’t have that and don’t want to run to the store, you can whip up your own using a few simple ingredients (such as brown sugar, white sugar, cornstarch, and dry milk powder) that you’ll probably have hanging around your cheery cabinets anyway. Didn’t I tell you these were no-problemo wonder cookies?

No-Molasses Gingerbread Cutout Cookies 23--122413

So whether you’re singing full harmony this season or battling the holiday existentialism blues like I am, these cookies are an easy must-make solution you won’t want to miss. Happy holidays to all, and to all a great cookie coma!

Ala

No-Molasses Gingerbread Cutout Cookies
Biscuit recipe adapted from Allrecipes.com
Ingredients:
  • 1/2 cup butter or margarine, softened
  • 1/2 cup packed dark brown sugar (light will also work)
  • 1 (3.5 oz.) package instant butterscotch pudding mix* (See Notes for a DIY alternative that I used)
  • 1 egg
  • 1 1/2 cups all-purpose flour
  • 1/2 teaspoon baking soda
  • 1 1/2 teaspoons ground ginger
  • 1 1/2 teaspoons cinnamon

* Note: For a DIY alternative to instant butterscotch pudding mix, use 1/4 cup brown sugar, 1 tablespoon white sugar, 2 tablespoons corn starch, 1 1/2 tablespoons  nonfat dry milk powder, and a tiny pinch of salt. Combine these ingredients in a medium bowl and set aside to use in place of butterscotch pudding mix.

Directions:

  1. In a large mixing bowl, cream together softened butter and brown sugar until smooth. Stir in butterscotch pudding mix OR the DIY alternative (see Note above).
  2. Mix in egg. Add remaining dry ingredients (flour, baking soda, ginger, and cinnamon) and mix in until just incorporated.
  3. Wrap dough in plastic wrap and chill in refrigerator for at least one hour, until firm enough to roll out easily. You can also toss it in the freezer for 20 minutes to speed up this process.
  4. Preheat oven to 350 degrees F.  Lightly grease cookie sheets and set aside.
  5. Break off 1/4 of the dough and place it on a well-floured cutting board. Return the rest to the refrigerator so that it does not soften too much in the meantime. Using a floured rolling pin, roll out dough until it is fairly thin, about 1/8-inch thin. Cut out shapes using cookie cutter and carefully transfer to prepared sheet. Repeat and continue this process until you have used all of your dough, or run out of room on cookie sheets.
  6. Bake cookies in preheated oven for 10 to 12 minutes, or until they turn golden brown on the bottom and are pretty firm. Remove from oven and allow to cool completely before serving, icing, or decorating as creatively as you’d like!

3 Comments

Filed under Baked Goods and Desserts, Cookies

Copycat Red Lobster Cheddar Bay Biscuits

Copycat Red Lobster Cheddar Bay Biscuits 5--121913

During my training to become a teacher, I was taught one cardinal rule–the one rule everyone must obey to maintain their sanity, well-being, and unity as a disseminator of knowledge.

Steal. Steal, steal, steal.

Copycat Red Lobster Cheddar Bay Biscuits 11--121913

If that sounds like a weird thing to do as a role model, you’re right. And then again, not quite. See, our pedagogy instructor (bless his soul) thinks that the surest way to success as a teacher is by learning from others’ and, when we like what we see, by taking it and using it for ourselves.

I can’t say I’ve done a splendid job of that at my, well, job. I’m too much of a prideful perfectionist to copy other people’s lesson plans, no matter how wonderful they are, and I usually spend many hours before a class trying to disentangle the hopelessly jumbled threads of a lesson plan I’ve been intricately weaving.

Copycat Red Lobster Cheddar Bay Biscuits 8--121913

But when it counts and there are hot, buttery, awesomely cheddar-filled biscuits on the line, apparently I am very good at stealing. For anyone who has ever sunk his or her teeth into a Red Lobster’s famous cheddar bay biscuit, that person will know that I am not kidding. These things are killer, phenomenal, and absolutely steal-worthy. I took one of my favorite Southern buttermilk biscuit recipes and, by brushing it with an awesome butter-parsley-garlic glaze, transformed it into these Red Lobster copycat biscuits. And they may even be better than the real deal. Trust me, you’ll want these on your holiday platters this year.

Copycat Red Lobster Cheddar Bay Biscuits 2--121913

So what are you waiting for? Steal this recipe now (with creds, of course!)  and see who you can wow with restaurant-style biscuits, right from your home kitchen!

If you could recreate a copycat version of any recipe, what would it be?

Ala

Copycat Red Lobster Cheddar Bay Biscuits
Biscuit recipe adapted from Food.com
Ingredients:
  • 2 cups all-purpose flour, plus more for dusting board
  • 1/4 teaspoon baking soda
  • 1 tablespoon baking powder
  • 1 teaspoon garlic salt
  • 6 tablespoons butter or margarine, chilled and cubed (needs to be very cold)
  • 1 cup buttermilk
  • 1 cup sharp shredded cheddar
  • For butter glaze:
  • 2 tablespoons butter, melted
  • 1 teaspoon garlic powder
  • 1 teaspoon dried parsley flakes

Directions:

  1. Preheat oven to 450 degrees F. Lightly grease a baking sheet and set aside.
  2. Combine flour, baking soda, baking powder, and garlic salt in a large bowl.
  3. Add very cold butter cubes to dry mixture. Using a fork, cut in butter evenly so that the entire mixture resembles a coarse meal.
  4. Add buttermilk and mix in until just combined. Be sure not to overmix, or your biscuits will not be soft and flaky! As you work about half of the buttermilk in, add the cheddar cheese and gently fold in throughout the mixture until everything is just combined.
  5. Very gently turn dough out onto a lightly floured cutting board. Pat (do not roll!) your dough out until it is about an inch thick. Don’t worry about it being even!
  6. Use a round cookie cutter or the open end of a lightly floured glass to cut out biscuit dough. You can make these as large or small as you’d like–I made mine about 3 inches in diameter. (Note: Red Lobster’s biscuits are drop biscuits, so jagged edges rather than perfectly round ones will work beautifully!) Continue gently cutting out biscuits and gathering your scraps until all your dough is finished.
  7. Place biscuits 2 inches apart on prepared cookie sheet.
  8. Bake in preheated oven for 10-12 minutes, until golden brown.
  9. While biscuits are baking, make butter glaze by combining 2 tablespoons melted butter, garlic powder, and dried parsley in a small bowl.
  10. Remove sheet from oven and immediately brush each biscuit with butter glaze. Allow biscuits to cool slightly before serving. These stay good in a sealed paper bag; just reheat them before eating!
ShowStopperSaturday2

6 Comments

Filed under Appetizer, Lunch & Dinner

Epic Dulce De Leche Brownies

Epic Dulce De Leche Brownies 2--112913

It’s that time of the year again. You know, December: the month of Christmas lights, good cheer, the smell of warm apple pie wafting around every street corner, the murmur of family chatter over holiday feasts, and the universally-acknowledged wish that we all had the metabolic capacities of high school swimmers again.

Yeah, that time.

Epic Dulce De Leche Brownies 5--112913

These fudgy, rich, and not-a-dry-crumb-in-sight brownies made me wish really, really hard for that metabolism. Ditch the woolen socks (although after these I could use a roomier pair of jeans) and come onnnn, Santa!

Epic Dulce De Leche Brownies 11--112913

In our extended household, holiday dinners are always something of a battlefield. Imagine the Spartans meeting the Huns meeting Napoleon Bonaparte, then imagine them getting squished into an itty-bitty little corner by Brobdingnagian knocking elbows and clattering plates. Stretchy pants are the phrase of the day, and chopsticks are our surprise weapon of choice here.

Epic Dulce De Leche Brownies 8--112913

I like to think we burn off all of our food just by fighting for it–but I may or may not have majored in Wishful Thinking in college.

Epic Dulce De Leche Brownies 14--112913

So as you sit there at your computer regretting all the extra stuffing, strudel, and sausage you shoveled onto your plate this lovely weekend-after-Thanksgiving (for all you Americans out there, at least!), I am going to sit here at MY computer–completely blameless, thumbs twiddling–and introduce you to these Epic Dulce de Leche Brownies. Please enjoy the photo-music I have prepared for you while you wait…

Epic Dulce De Leche Brownies 17--112913 Epic Dulce De Leche Brownies 20--112913 Epic Dulce De Leche Brownies 23--112913 Epic Dulce De Leche Brownies 26--112913 Epic Dulce De Leche Brownies 29--112913

La la la la lots, and to all a good–no, amazing, awesome, EPIC brownie! And you can feed them to the people around you so you feel better about yourself, ha ha. <– But seriously, this actually works…have you tried it? Then don’t talk until you have.

These are, hands down, unlike any brownie I have ever made–and I say that having made all of these uhmayzing variations. You saw the “Dulce de Leche” in the title and thought these were just normal dulce de leche brownies, didn’t you? Oho, not so, my fast friends. Here’s the secret to these incredibly fudgy, and possibly most flavor-packed brownies ever: the dulce de leche goes straight into the batter. Not swirled, not drizzled. IN.

Epic Dulce De Leche Brownies 32--112913

Although I have recently taken to creating my own recipes (including my all-time favorite Best Chewy Biscoff Blondies recipe–have you checked it out yet?), I have Sommer from A Spicy Perspective to thank for this recipe. She even goes to the trouble of diagramming the epic proportions that make up this extra-thick, ultra-fudgy brownie! Talk about dedication. I was sold faster than a Black Friday Playstation 4 combo set (which, sadly, I have not yet been gifted).

Epic Dulce De Leche Brownies 35--112913

But really, you need to make these to believe these–they will have your family and friends caroling your praises all season long! And with New Year’s resolutions galore right around the corner, you’ll want to make these NOW. There’s no time like the present–and what better present than gifting yourself a batch of the best brownies ever?

Happy holidays!

Ala

Epic Dulce de Leche Brownies

Yield: 1 9×9-inch baking pan; 16 large squares

Adapted from A Spicy Perspective, who is basically a genius

Ingredients:

  • 8 oz. (or approximately 1.5 cups) dark chocolate chips–semi-sweet will work in a pinch
  • 3/4 cup unsalted butter or margarine
  • 7 ounces dulce de leche OR homemade dulce de leche (Recipe below)
  • 1/2 cup white sugar
  • 2 teaspoons vanilla extract
  • 3 eggs, room temperature
  • 5/6 cup all-purpose flour
  • 2 tablespoons and 2 teaspoons unsweetened cocoa powder
  • 1 1/4 teaspoon salt
  • 2 teaspoons instant coffee granules, crushed
  • 1.5 cups semi-sweet chocolate chips (other add-ins, such as nuts or chopped candy, may also be added)

Directions:

  1. Preheat oven to 350 degrees F. Line a 9×9-inch baking pan with lightly greased foil and set aside.
  2. In a microwave-safe bowl, melt butter, chocolate, and dulce de leche together in 30-second intervals, stirring vigorously between each interval.
  3. Beat white sugar into melted chocolate mixture.
  4. Add vanilla and egg, then mix until combined.
  5. Add flour, cocoa powder, salt, and coffee granules. Stir in until just incorporated.
  6. Gently fold in 1 cup semi-sweet chocolate chips and other desired add-ins.
  7. Bake in preheated oven for 30-35 minutes, until toothpick comes out MOSTLY clean–trust me, your brownies will be ready to party at this point! Remove the pan from the oven and immediately sprinkle with remaining 1/2 cup semi-sweet chocolate chips. Wait 5 minutes, then spread the melted chocolate over the tops of the brownies.
  8. Allow to cool completely on stovetop before cutting brownies into fudgy, delicious squares of epic proportions.

Dulce de Leche Recipe

There are many ways to make dulce de leche at home. I used the oven method, which is simple and requires 1 (16 oz.) can of sweetened condensed milk–for the recipe above, you will only require half of this amount, or 8 oz.

  1. Preheat oven to 425 degrees F.
  2. Pour the condensed milk into a baking dish and loosely cover it with foil.
  3. Place this baking dish in a roasting pan or a larger baking pan; fill the large pan with hot water until it reaches halfway up the sides of the smaller pan. Then slide both pans into the preheated oven.
  4. Bake for approximately 80-90 minutes, stirring at 15-minute intervals. Your dulce de leche will achieve a rich golden caramel color and should be fairly thick. For more visual and detailed instructions, see the Wiki page for How to Make Dulce de Leche.

Tuesday Talent Show Link Party at Chef in Training! It is held weekly and has some amazing link ups!christmas cast party buttonShowStopperSaturday2

11 Comments

Filed under Baked Goods and Desserts, Brownies & Chocolates

Killer Cookies ‘N Cream Brookies and Oreo Butter: An Online Bake Sale for the Philippines

How does one not lose all control when digging a fork into this warm, melting gooey Oreo lovers’ mess?
Killer Cookies 'N Cream Brookies gif 3
Oh, that’s right. One doesn’t. If you couldn’t tell by the gif.
But before I get started on these outrageous Oreo cookies ‘n cream brookies (yes, that’s a brownie + cookie smashed into one sugar-coma-inducing concoction), I want to tell you about a really important event, and the story behind why I decided to tackle these in the first place.
Killer Cookies 'N Cream Brookies 2--112113
As anyone who even remotely follows world news knows, a terrible storm hit the Philippines a few weeks ago. While the story has sadly faded off the radar of our fast-paced, sensation-seeking U.S. media, the relief and rebuilding efforts–as is true with any disaster, big or small–are still happening around the clock, around the world, to help the affected people and areas. I have spent ample time researching and making my own donations to the Philippines Red Cross (which, by the way, I definitely recommend if you’re considering making donations but worry about where your donations actually go–they’re one of the established agencies that you can count on to get your money to the relief spots), but wasn’t sure what I could do beyond that to spread the word. Then, by some unlooked-for chance, I stumbled across Tina’s blog, and get this: she is hosting an online bake sale to raise funds to support the relief effort! Very important? YES. I almost never do plugs for other blogs, but please consider learning more about how you can help through a small gesture that will go a long way, no matter what source you choose (as long as it’s a reliable one).
Killer Cookies 'N Cream Brookies 5--112113
How it works: 1. Tina is accepting ‘virtual baked good donations’ until FRIDAY, 11/22/13. All you have to do is fill out a pledge form and send her a photo of the goods you will be ‘selling’ for donations.
2. Starting on MONDAY, 11/25/13, bidders can view all of the goods-for-sale at Tina’s site. Bids start at $20. The highest bidder at the end of the day ‘wins’ the baked goods he/she bid on and will donate that money directly to Sagip Kapamilya, a relief foundation for the Philippines.
3. The baker will ship the goods directly to the bid winner. That’s it. Simple, and good.
Killer Cookies 'N Cream Brookies 8--112113

(Sorry, this up-close shot of gooey melting fudge and gooey cookies is necessary.)

If it’s within your resources to do so, please consider bidding! Again, this is a really worthwhile cause that I love because it emphasizes what we have: an amazingly strong community of bakers and readers who champion all sorts of causes, not just ones that deal with food. In case you’re curious about my particular entry, I’ve decided to go all out by theming my package with one of my all-time favorites: the Oreo cookie. Below is the description I included for my package:

Killer Cookies 'N Cream Brookies 25--112113

Oreos are the yin-and-yang of the cookie world: A creamy filling sandwiched between two decadent chocolate cookies. Like Oreos, life is a mix of yin and yang…and when it hits, it can hit us hard. Fortunately, now’s your chance to do some good while getting outrageous Oreo good out of it. Your Outrageous Oreo package contains a variation on my most popular brookie recipe: a fudge-packed chocolatey brownie layer topped with a gorgeous cookies ‘n cream chocolate chip blondie and whole Oreos jammed into the gooey center. You’ll also want to prepare to sink your teeth into two GIANT Oreo-stuffed chocolate chip cookies. And if you aren’t Oreo’d out by the time you reach it, a jar of homemade Oreo white chocolate peanut butter spread will be sure to tempt your spoon (and your willpower) for as long as it lasts. The perfect package for any Oreo lover. So what do you say: Are you out, or Oreo in?
Killer Cookies 'N Cream Brookies 11--112113

I know this isn’t “my” bake sale…but thank you, thank you, thank you!

Killer Cookies 'N Cream Brookies 14--112113

But before I wrap things up here, I seriously want to give you an idea of how awesome this explosion of outrageous Oreo baked goods really is. I kid you not: one entire 15.3 oz. package of Oreo cookies went into the making of this package. So whoever gets this is advised not to look at the nutrition label on a package of Oreos for the next month or so. Holy mackerel, that’s a lot of Oreos!

Killer Cookies 'N Cream Brookies 20--112113

The Killer Cookies ‘N Cream Brookie: Maybe you’ve heard of a brookie before. For those of you who haven’t, it’s made of crack a cookie layer smooshed on top of (or under) a brownie layer. Sound simple? Hang on while I say ‘ha ha ha’ and dispel that funny little notion from your head. Of course, a brookie CAN be simple. But what I love about this ramped-up killer cookies ‘n cream version is that it takes the fudgiest, gooiest brownie base, crams a whole layer of WHOLE OREO COOKIES all up in the there, and then tops that off with a crazy chunky, chewy, cookie-n-creamy chocolate chip blondie bar layer.

YEAH. BET YOU DIDN’T SEE THAT COMING. WHAT NOW BROOKIE.

Killer Cookies 'N Cream Brookies 30--112113

Oreo Butter 2--112113

Oreo Butter: What happens when you throw half a package of Oreos into a food processor with white chocolate and peanut butter? AWESOME. That’s what happens. A perfect way to spread the love to all your favorite things, including cookies, waffles, sandwiches, and–yes, you guessed it–even Oreos.

Oreo-Stuffed Chocolate Chip CookiesWe’ve all heard about them. You’ll just have to try them to believe it. ‘Nuff ‘stuff said.

Killer Cookies 'N Cream Brookies 23--112113

Oreo Butter 5--112113

Don’t forget to check out the online bake sale on Monday, 11/25/13! Thank you!

Killer Cookies 'N Cream Brookies 27--112113

Love,

Ala

Killer Cookies ‘N Cream Brookies
Yield: 1 9×9-inch baking pan; 16 large squares
For Insanely Fudgy Gooey Brownie Layer: (this recipe is my own creation but was inspired by a mix of Allrecipes, Smitten Kitchen, and Something Swanky brownie recipes–thanks!_
Ingredients:
  • 8 tablespoons butter or margarine, melted
  • 1 cup white sugar
  • 2 eggs, room temperature
  • 1 teaspoon vanilla extract
  • 1/2 cup all-purpose flour
  • 1/2 cup unsweetened cocoa powder
  • 1/4 teaspoon baking soda
  • 1/4 teaspoon salt
  • 1 cup chocolate chips or chunks
  • 16 whole Oreos

Directions:

  1. In a large mixing bowl, cream together melted butter and sugar until sugar is completely dissolved.
  2. Beat in eggs and vanilla.
  3. Gently mix in flour, cocoa powder, baking soda, and salt until just incorporated.
  4. Fold in chocolate chips.
  5. Reserve whole Oreos for assembly (see instructions below)
For Cookies ‘N Cream Cookie Bars:
Slightly adapted from Picky Palate‘s wonderful recipe
Ingredients:
  • 1/2 cup butter or margarine, softened
  • 1/2 cup white sugar
  • 1/2 cup packed brown sugar (I used dark)
  • 1 egg
  • 1 teaspoon vanilla extract
  • 1 1/2 cups all-purpose flour
  • 1/2 teaspoon baking soda
  • 1/2 teaspoon salt
  • 1/2 cup white chocolate chips
  • 1/2 cup semi-sweet or milk chocolate chips
  • Approximately 14 Oreos, roughly chopped

Directions:

  1. In a large mixing bowl, cream together butter and both sugars until light and fluffy, approximately 2 minutes of strong creaming.
  2. Beat in egg and vanilla.
  3. Add flour, baking soda, and salt. Mix in until just incorporated.
  4. Gently fold in both chocolate chips and chopped Oreos.

To Assemble Your Killer Brookies:

  1. Preheat oven to 350 degrees F. Line a 9-inch square baking pan with lightly greased foil.
  2. Pour brownie batter into baking pan. Spread evenly.
  3. Top with 16 evenly-spaced whole Oreos.
  4. Drop cookie dough evenly over the layer of Oreos. Spread dough gently so that it covers the entire top of the pan.
  5. Bake in preheated oven for 27-32 minutes, or until a toothpick inserted comes out clean and your cookie layer looks slightly crispy (it should be a golden brown color) but is not yet overbaked.
  6. Allow to cool at least 30 minutes in pan before cutting and serving.

Oreo “Butter”

Ingredients:

  • Approximately 20 Oreo cookies, coarsely chopped/crushed
  • 1/2 cup peanut butter
  • 1/3 cup white chocolate

Directions:

  1. Place Oreos in a food processor and grind them until they achieve a crumb consistency.
  2. Add peanut butter and white chocolate. Continue processing for another 5-7 minutes; the time will depend on the power of your food processor. Your Oreo spread will clump up at first, but as you continue processing it will begin to turn into a gritty paste, and then slowly turn into a much smoother, almost liquid-like spread.
  3. Store your Oreo butter in a jar at room temperature. Spread it on anything and everything (waffles, crackers, sandwiches, more cookies–the possibilities are endless)!
Will Cook For SmilesTuesday Talent Show Link Party at Chef in Training! It is held weekly and has some amazing link ups!

1

6 Comments

Filed under Baked Goods and Desserts, Bars, Brownies & Chocolates, Dips/Spreads

The Amazing ‘Un-Relationship’ Chocolate Chip Cookie

This is the story of the Amazing Un-Relationship Cookie. Have you spent your whole life wondering when you would ever find that special something in your life? Well, stop looking. You’ve found it. And guess what? You found it a long time ago.
The Amazing 'Un-Relationship' Chocolate Chip Cookie--2--111413
This is going to be a long post. If you get tired of reading, feel free to skip through to the pictorial guide on 8 REASONS THE ‘AMAZING UN-RELATIONSHIP COOKIE’ WAS MEANT FOR YOU. But for those of you still with me, let’s start with the basics.
What exactly is an Un-Relationship? Un-Relationships are like relationships, but with truly no strings attached. This is because the relationship depends on you, the individual, and you alone. So if you have an Un-Relationship with food, for example, you are the only person who can define your attitude towards, and your satisfaction with, whatever food you happen to be have in mind. For me, these cookies symbolize everything that goes into a healthy Un-Relationship (more on that later).

The Amazing 'Un-Relationship' Chocolate Chip Cookie--5--111413

Just You, and You. No matter what your official relationship status is–whether you’re comfortably married or happily single, flirty & fun or settled & won–we all have our own special relationship with food. What do you love most about it? The thing I love most about food is that it will never judge you. Ever. This is essential for creating an UN-RELATIONSHIP. Others may judge you, and sadly they may judge your relationship with food, although I firmly believe we fixate on what we think other people think about us rather than what they actually believe. Goodness knows many of us judge ourselves for our relationship with food, and I have no doubt hails of self-judgment poured down on my head as I reached for my eighth cookie after finishing the photoshoot you see here. But food itself will never, ever judge you, which is part of why I love it so, so much, just like I love a fortieth rereading of Ella Enchanted or the giant killer whale stuffed animal that sleeps with me at night.
The Amazing 'Un-Relationship' Chocolate Chip Cookie--8--111413
Our Relationship with Food? While I was researching and comparing recipes for this post, I found that this cookie has been raved about all over the blogosphere in a whole lot of ways. The recipe I am sharing with you today is very similar to the Best Big, Fat Chewy Chocolate Chip Cookie recipe you’ll find with over 6,000 glowing reviews on Allrecipes. Another original variation is called the “I Want to Marry You” cookie or, alternatively, the “Will You Marry Me?” cookie, and I thought it was the cutest-sounding thing ever when I first came across it at Bakergirl’s blog. And, like Bakergirl, I bookmarked these because who doesn’t want to dream about a cookie that will make McDreamy drop down on one knee and profess his undying love for you on the spot?
So I made these, and as I sat there sinking my teeth into the first, and second, and third test cookie, I started to think about what would name these cookies. Were they really ‘Marry Me’ cookies, or something else? Food, and relationships. What’s the relationship between them?
The Amazing 'Un-Relationship' Chocolate Chip Cookie--11--111413
Keeping Your Kitchen Clean From ‘Relationship Stuff.’ As a single, extroverted food-blogger-by-day/grad-student-by-the-other-24-hours, I grew up hearing the same questions over and over again: “Why aren’t you dating so-and-so?” and “What happened to guy XYZ who was ‘clearly’ interested?” Why wasn’t it enough that I simply wasn’t interested in guys X, Y, or Z?  I certainly wasn’t thinking along these lines when I first stumbled across the recipe for these cookies: amazing chocolate chip/white chocolate cookies with oats folded into a wonderfully chewy batter. Truth be told, the last thing I want to think about when I’m in the kitchen trying to escape from my humdrum everyday life is whether or not these cookies will be the impetus for a monogamous relationship with the man of my dreams. Because no pressure on this giant blob of cookie dough sitting on the counter, right? Might as well start my new fake and overwhelmingly bikini-tanned account on Match.com now. 
The Amazing 'Un-Relationship' Chocolate Chip Cookie--14--111413
Celebrating the Un-Relationship. As Mel Gibson says in all his worldly, product-placemented wisdom, food does not care what you wear or whether you make more money than it does. It also does not care whether you’re the young bride or “that token single girl” among your group of friends. It amazes me that there is not a single recipe I can think of off the top of my head that celebrates what many of us embrace, or trudge through, or tough out with a pint of chocolate chip cookie dough ice cream, every single day. And that’s not just the fact of being happily single–which I currently am, without preference or anxiety about it. Every pair of eyes that has so much as glanced at this post (or any food blog out there) consents to the same, unacknowledged idea: we want an honest, beautiful, and judging-less Un-Relationship with our food.
The Amazing 'Un-Relationship' Chocolate Chip Cookie--17--111413
A Powerhouse of Enjoyment. How many of us have paused to think about how many empty calories went into battering and deep-frying the bejeezus out of those apple fritters you used to dearly love? I’ll raise my hand: I’m certainly much more conscious about what ends up on my plate than I was back in my high school swimming, devour-everything-in-sight days. But at a fundamental level, I also realize how important it is that I am the only one in control of what I eat, what makes me feel good, and what I enjoy. This last element is essential to a healthy Un-Relationship. If the food I eat makes me feel in control and makes me feel good, but at the end of the day I don’t enjoy it, I choose not to eat it. It’s as simple as that. I LOVE hummus because I enjoy it, but I would as readily eat a cone of ice cream because I enjoy that, too. And because there are no strings attached, no judgment that matters except my own, I love knowing I have the power to choose.

The Amazing 'Un-Relationship' Chocolate Chip Cookie--26--111413

About the Amazing ‘Un-Relationship’ Chocolate Chip Cookie: Believe it or not, it took sitting down, tasting, writing about, and re-tasting these {AMAZING} cookies to make me realize this. Alongside my favorite Best Biscoff Chocolate Chip Cookies, the Amazing Un-Relationship Cookie I’m sharing with you today is crowd-tested, and both mom AND me-approved (which is rare!). It reminds me about everything I love most about having an Un-Relationship with food: as Eleanor Roosevelt once said, “Nobody can make you feel inferior without your consent.” Well, I love these cookies, plain and simple. I love their warming chewiness, I love their decadent melting chocolate, I love that I love to reach for a fourth and a fifth straight from the tray. I love sharing them with others, and most of all I love how they transport me away from all of the exhausting day-to-day relationships we grapple with every single day (because as much as we embrace our loved ones, relationships are still complicated pieces of work!) and let me indulge the here & now. Single, married, taken, loved–everything set aside, for the sake of a single cookie. Pun intended? Maybe.

The Amazing 'Un-Relationship' Chocolate Chip Cookie--29--111413

So forget about the stigma. Forget about the judgment or the fear or the criticism. I realize that we can have amazingly complex, sometimes even painful attitudes towards food and its relationship with our bodies or self-image. BUT FORGET ALL OF THAT FOR A MOMENT THE NEXT TIME YOU COOK, OR PICK UP YOUR FORK, OR PULL THESE COOKIES WARM AND MELTING FROM THE OVEN, OR WHATEVER YOU CHOOSE TO DO WHEN YOU STEP INTO THE KITCHEN. Every judgment-less bit or bite can be an exhilarating experience if you let it. Of course, you can build amazing relationships through shared connections with food, and I would definitely vouch for testing out that hypothesis by serving up a batch of these chocolate chip cookies at your next get-together. But most importantly, if you choose to make these cookies just for yourself to enjoy at the end of a long day, that’s okay, too. Because that’s what Un-Relationships are about. Right now, a cookie, and you.

The Amazing 'Un-Relationship' Chocolate Chip Cookie--35--111413

And maybe a tall glass of milk.
AlaThank you for reading!

Cast-Party-Wednesday-Fall-button

The Amazing Un-Relationship Chocolate Chip Cookie
Yield: Approximately 3 dozen cookies
Ingredients:
  • 1 cup butter or margarine, melted
  • 1 1/4 cup dark brown sugar
  • 1/2 cup white sugar
  • 1 egg
  • 1 egg yolk
  • 1 teaspoon vanilla extract
  • 2 cups flour
  • 1 cup quick-cooking oats (rolled will also work fine)
  • 1/2 teaspoon baking soda
  • 1/2 teaspoon salt
  • 1 teaspoon ground cinnamon
  • 1 cup white chocolate chips
  • 1 cup semi-sweet chocolate chips

Directions:

  1. Preheat oven to 350 degrees F. Lightly grease a cookie sheet and set aside.
  2. In a large mixing bowl, mix together melted butter and both sugars until smooth.
  3. Beat in egg, egg yolk, and vanilla.
  4. Gently stir in flour, oats, baking soda, salt, and cinnamon until just combined.
  5. Gently fold in both chocolate chips. Make sure not to overmix, or your cookies will toughen up and you want them to stay chewy!
  6. Scoop out 1-inch cookie dough balls and place two inches apart on baking sheet. Bake in preheated oven for 9-11 minutes, or until they look just set but not overdone (they will have begun to crisp and turn golden around the edges, but seem slightly underbaked in the middle). This is perfect for keeping the cookies chewy–just set your baking sheet on top of the stove for at least 15 minutes to cool and ‘finish baking’ completely before removing to a wire rack.

4 Comments

Filed under Baked Goods and Desserts, Cookies

Caramel ‘Could Be Crack’ Snack Mix

I am a home-grown, Converse-wearing caring-is-sharing gal, and I have never, ever ever used drugs except in my extra-special brownies. And yeah, you’re staring at the exception to that rule right now. Well, stare away, my lovelies, and let’s talk crack snack mix.

Caramel 'Could Be Crack' Snack Mix 2--111113

If you’ve been following my blog recently, you will know that I am totally digging the idea of photoseries–you know, turning ordinary food photography into fun-derful stories. This recipe deserves its own photoseries. Let me put it this way: this is the single most-requested potluck, party, zombie-apocalypse-you-name-it-event recipe I have ever madeSo will you want to print, Pin, and share this recipe on Facebook? You bet your bowling balls you will.

Caramel 'Could Be Crack' Snack Mix 5--111113

Let’s make one thing clear. Like most addictions, this snack mix is liable to ruin your lifeWillpower? Buh-bye. Your ex? Kow-towing at your doorstep. And diet what?

But it’s important to get all of these minor questions out of the way first, because then we can talk about why my friends are spamming my text inbox and Facebook wall with requests for this. Damn. Crack.

Caramel 'Could Be Crack' Snack Mix 8--111113

Nobody who has tasted it seems to know what goes into it. I have tested this recipe on 20+ unsuspecting victims wonderful friends and the very first question to leave all of their crack-coated lips never fails to be, “What the HECK did you put in this, Ala?” A brawl almost literally broke out over the remaining caramelly crumbs when I brought this to a party last weekend, which is always kind of a major ego boost. It’s a pity fights don’t break out over me like this.

But I’ll let you in on the secret. SHHHH.

Caramel 'Could Be Crack' Snack Mix 11--111113

Throw in some cereal. Whatever you have on hand works. I had those Chex Mix corn squares. Chop up some of whatever else you have on hand. Leftover Halloween candy? Great. Frozen cookie dough? No problem. Nuts? Perfecto. Actual crack? GO FOR IT. No, maybe you shouldn’t…not that you’ll need it, anyway. I went ahead and mixed in some chopped-up failed blobby cookies, then threw in cookie butter for good measure. Because I’m a sadist that way.

Caramel 'Could Be Crack' Snack Mix 14--111113

Then throw some butter, lots of brown sugar, and corn syrup into a pot on the stovetop. Don’t be shy. Your waistline will become intimately acquainted with the mixture shortly.

Let that cook up and caramelize into a crazy creamy goo. Stir in some more cookie butter if you must. Stir in some baking soda, salt, cinnamon, and vanilla extract, then spread your cereal mix on a cookie sheet and pour the whole caramel shebang over it with the blissful knowledge that about half of it will get stuck on the sides of the pot and you will have to lick it all off yourselfFeel free to do your “clean-up” while you throw the tray into the cookie tray into the oven to bake.

And that’s it.

Caramel 'Could Be Crack' Snack Mix 17--111113

Crazy, crunchy, caramelly, CRACK.

Ready to take the plunge?

Ala

Print this recipe! Did you enjoy this photoseries? I would love to hear your feedback and comments. For more fun-derful updates from Wallflour Girl, follow me on Pinterest and Facebook. See you on the crack–er, flip side!

Caramel ‘Could Be Crack’ Snack Mix
Ingredients:
  • 5 cups Chex cereal (or any other plain cereal of your choice)
  • 1-2 cups of other mix-ins (I used leftover chopped-up cookies; you may also use nuts, chocolate, candies)
  • 1 cup butter or margarine (OR 3/4 cup butter and 1/4 cup cookie butter)
  • 2 cups brown sugar
  • 1/2 cup corn syrup
  • 1 teaspoon salt
  • 1/2 teaspoon baking soda
  • 2 teaspoons ground cinnamon
  • 1 teaspoon vanilla extract

Directions:

  1. Preheat oven to 250 degrees F.
  2. Line a cookie sheet with lightly-greased foil. Toss together cereal and mix-ins on lined cookie sheet. Set aside.
  3. In a large pot over medium heat, heat up butter (or butter & cookie butter) until melted. Add brown sugar, corn syrup, and salt. Bring to a boil and allow to boil for 4 minutes without stirring. Your mixture should reach a deep caramel-brown color at this point. Turn off burner and remove pot from heat.
  4. Stir in baking soda, cinnamon, and vanilla.
  5. Pour caramel mixture evenly over cereal mixture, taking care to coat cereal thoroughly. Don’t be afraid to stick your spoon (or hands) in there to make sure you get every last bit crack-ified.
  6. Bake in preheated oven for 60-75 minutes, stirring cereal every 15 minutes to get an even crunch. Your mix will be ready to take out from the oven when the cereal begins to feel crispy but has not completely hardened.
  7. Allow to cool completely before serving to the friends pining outside your door.
Will Cook For SmilesTuesday Talent Show Link Party at Chef in Training! It is held weekly and has some amazing link ups!
Will Cook For Smiles

1
1

16 Comments

Filed under Baked Goods and Desserts, Snacks

Italian Cream Layer Cake {and some THOUGHTS)

There are several reasons for the delay in this post–and I promise, I have been dying to share some of my latest recipe creations with you folks, because they are A+ crowd-approved. But this is going to be a fairly serious post. If you want to skip straight to the photos and recipe at the end because you’re not prepared for a Debbie Downer kind of post, I won’t be offended. Promise. (Plus, I have no way of actually knowing, so take your virtual anonymity and run with it.) And despite the lack of attention it’s going to get here, this Italian Creme cake is actually really, really amazing. Again, more about it in the recipe box below.
Italian Cream Cake 1--110613
We had two major losses in our lives last week–one member of our family, and one dear, dear friend passed away. So we have been understandably busy attending the memorials and services, not to mention grieving. They will be missed dearly.
As with any major loss–especially a first loss–I have spent a considerable amount of time thinking. About life, but also about a lot of things you wouldn’t think you’d think about when everything’s so crazy you just don’t have time to stop and…think.
Italian Cream Cake 4--110613
When I started this blog one year ago, I wasn’t sure what I wanted to accomplish. To a certain extent, this is still a question that hangs over my head every once in a while. I love creating great content, I love writing, I love making and sharing my food adventures, and I sure as heck love every single ounce of support I get from all of my friends, family, and–of course–you, readers. But this is also in many ways a self–and therefore selfish–blog, and it offers an outlet for my thoughts in a way that I don’t always get in the “real world,” talking to “real people” for whom I feel held accountable to explain myself. So with that rambling premise, I proceed on my (even more rambling) ramble. About thinking, mostly.
Italian Cream Cake 6--110613
This has been a very crazy year: I have been through so many changes in my personal life, my living situation, my relationships with others, and my priorities. Most recently, I have been studying for a crazy exam that I have thankfully pushed back to January (hopefully) and that I am still feeling guilty about not studying for at this very moment. I can’t tell you how INSANE it feels when every little moment of your life is filled with this constant, insatiable guilt about not working harder than you already are. Even if you are already doing the inhuman and trying to finish a bajillion and one books and remember them all and you are CONVINCED you are the ONE legitimate person in your program who suffers from Imposter Syndrome. Because there is no way anybody could be less prepared than I am to pass this test. And despite the super supportive “You’ll do great!”‘s and “Dude, you’re going to blow this exam out of the water”‘s (all of which I appreciate, don’t get me wrong), I still don’t believe it. I’m not even trying to be cautiously optimistic. I just can’t believe it at this point. This is my current thought process about my qualifying exams, in a nutshell. And I’m okay with that…sort of.
Italian Cream Cake 2--110613
So this brings me to thinking. Or not thinking. With the whirlwind that has taken my life by storm recently, I have left zero time to think. Not even close to zero. I mean, zero. This blog post might be the first time I’ve actually stopped to think about anything that has happened since last school year, and every damn time I try to stop and think, I feel as guilty as John Wilkes Booth. I don’t think it’s apathy. I think it’s numbness. Self-willed numbness. When I received news of both passings, I was shocked. I felt floored. Then I wondered whether I would be able to meet my self-imposed deadlines for reading that night, or whether I would be too busy being “distracted” with thinking to get anything done like a real non-failure would do. No, I didn’t think–nor do I currently think–this is reasonable. But it’s just how I feel. And believe it or not, I was able to pick up my book. Sure, I cried. I broke down and cried quite a bit, actually. But I read. And I still find myself counting down those days to the next deadline with a dread and anxiety that feels more real than the grief, which feels almost…unreal. Disembodied. Like somebody else is really feeling those emotions, but that it’s not going to hit me until all of this is over and done with. As I said, there has been no time for thinking, before right now. And there probably will not be much thinking after right now, because I can already feel the end of the night creeping in with pages still unread, knowledge still “unlearned.”
Italian Cream Cake 10--110613
To my awesome, amazing, dedicated friends who tell me to “take it easy” or “give yourself some you time”: I totally and completely appreciate this. I would not be still relatively sane without all of your support. But I think I’ve gotten to the point where what I really need is just this: “Yes, you’re in a study strait. We know you realize that this isn’t everything, and we know that you realize this will pass and come what may. But you’ve got to do what you’ve got to do. So go do it. We’re behind you.” I keep trying to tell myself that every single day, and every single day I come away a little less whole, a little less sure of myself, and a little more scared.
Still, I do make time, and I’m trying my darndest to take it in stride as I work my way through what seems to be superhuman swaths of work. It may seem self-punishing and it may seem unreasonable, but I don’t need to know that it will be OK–I just need now to happen, and I need to know that I have done it with all my heart. I will probably walk away from this post feeling like I just took away half an hour of valuable reading time, and that’s just a fact of things right now. It’s just something I need the people around me to know.
Italian Cream Cake 13--110613
My on consolation is that I can say the next statement sincerely: My most heartfelt love to the two amazing people in my life who are not lost, but simply a better part of everyone whom their lives touched. My deepest sympathies to the rest of their family and friends who, like us, are grieving. No matter what I am going through right now, and no matter what I say about not having time to stop and think–know that you are always, always in my thoughts. (Thanks for reading.)

Ala

Tuesday Talent Show Link Party at Chef in Training! It is held weekly and has some amazing link ups!

The Weekend re-Treat #38 FEATURES

Italian Cream Layer Cake
I haven’t gotten a chance to properly vouch for this cake in my post. MAKE. THIS. I am decidedly NOT a cake person–and neither are many of my friends, but I made this for a friend’s dinner and the family went over the moon about it. I left the other half of the cake at home–and it was gone before I knew it! A wonderfully nutty taste of coconut and almonds thrown into one of the richest, most indulgent cakes that you have never tried. Try this to wow your next dinner party guests!
 
Yield: 1 3-layer 9-inch cake
Slightly adapted from Bake at 350 
For the cake:
Ingredients:
  • 2 cups white sugar
  • 1/2 cup butter or margarine, room temperature
  • 1/2 cup canola oil
  • 5 eggs, separated, room temperature
  • 1 teaspoon baking soda
  • 1 cup buttermilk, room temperature (you can make your own using 1 cup minus 1 tbsp of milk, and then adding 1 tbsp vinegar and letting it sit for 5 minutes. Voila–instant buttermilk!)
  • 2 cups all-purpose flour
  • 1 teaspoon salt
  • 1 cup flaked coconut
  • 1 teaspoon vanilla extract

Directions:

  1. Preheat oven to 350 degrees F. Lightly grease three 9-inch springform baking pans if you have them. (I had only ONE springform pan and this worked out just fine–you will simply need to bake and cool in 3 different batches. If you do not have a springform pan, you may also use a regular 9-inch round baking pan, line it with parchment paper, and lightly grease the paper for easy removal of layers.)
  2. Cream together sugar, butter, and oil until light and fluffy, about 2-3 minutes. Add in egg YOLKS one at a time, beating well after each addition.
  3. Dissolve baking soda in buttermilk. Stir salt into 2 cups of flour.
  4. In three separate additions, alternate adding flour and buttermilk mixture to batter (make sure to begin and end with the flour).
  5. Fold in coconut flakes and vanilla extract.
  6. In a separate bowl, beat egg WHITES until they form stiff peaks. Note: The best way to beat egg whites is to use a completely dry copper or steel bowl; start your hand mixer on a low speed. After a minute or two, once your whites begin to foam, increase mixer speed to “beat” setting and continue beating until your whites pass the droopy peaks phase (the 2nd stage) and start to hold their shape in stiff peaks (the 3rd stage). Depending on the power of your mixer, this process can take anywhere from 10-15 minutes–be patient, and be sure to KEEP GOING so you can get those voluminous peaks!
  7. In three additions, fold egg whites gently into cake batter.
  8. Pour 1/3 of cake batter into each of the three prepared pans.
  9. Bake for 25 minutes (or until lightly golden) in preheated oven. Allow to cool in pan for at least 15 minutes before attempting to remove. Allow to cool completely before assembling.

For the cream cheese almond frosting:

  • 1 1/2 cups chopped almonds (you may also use pecans for a more traditional feel)
  • 1 (8 oz.) tub marscapone cheese (you may substitute cream cheese for a sweeter frosting), room temperature
  • 1 (8 oz.) block cream cheese, room temperature
  • 2 tablespoons butter or margarine, room temperature
  • 4 cups powdered sugar
  • 1/4 teaspoon salt
  • 1 teaspoon vanilla extract
  • 1/2 cup coconut flakes.

Directions:

  1. Place almonds or pecans in a thin layer on a cookie sheet. Bake in oven at 350 degrees for 10 minutes, stirring at the 5-minute mark to prevent burnt nuts. Remove from oven and set aside when nuts are nicely toasted.
  2. In a large bowl, cream together marscapone, cream cheese, and butter until smooth. Beat in 4 cups powdered sugar, salt, and vanilla; it will be easiest to add these ingredients one cup at a time.

To assemble cake:

  1. Place a cooled layer of cake on a round cake base. Spread approximately 1/3 cup of frosting on top; sprinkle with about 1/2 cup toasted almonds; then add another 1/3 cup of frosting on top of almonds. You may need more or less frosting, depending on how thinly you spread it.
  2. Top with second cooled cake layer. Repeat frosting from Step 1. Top with third cooled cake layer.
  3. Use remaining frosting to completely cover sides and top of cake. I reserved about 1/2 cup frosting to decorate the top of the cake by piping a shell border pattern around the edges, and a shell pattern and heart in the middle of the cake.
  4. Sprinkle remaining chopped nuts and coconut flakes around edges and top of cake.

4 Comments

Filed under Baked Goods and Desserts, Cakes & Cupcakes

The Very BEST Tiramisu–America’s Test Kitchen

YOU. Yes, you sitting there with your finger hovering over the mouse ready to click away at a moment’s notice and sneak cyber-stealthily away before reading the rest of this post. YOU WILL WANT TO STAY FOR THIS.
(Besides, MY TIRAMISU SEES YOU. So still those finicky fingers and sit yo bum down while I tell you about a fail-proof tiramisu recipe you just have to make. I do NOT use the appellation “very best” lightly.)
BEST Tiramisu from America's Test Kitchen 2--101913BEST Tiramisu from America's Test Kitchen 1--101913
#filter #nofilter
If you have been following my blog in recent months (or even if you haven’t–here comes the spoiler), you’ll know that I have been going slightly cray-cray lately studying for my qualifying exams. Which are coming up very, very soon. As in January soon. And if you have ever been through a period in your life when you’ve gone cray-cray crawfish style, you’ll know that you just don’t have time, the emotional capacity, or the sanity for the big heart-sinker: FAILED DESSERTS.
So of course I was uber-excited when I came across this no-bake, utterly fail-proof tiramisu recipe from America’s Test Kitchen.
And made it.
And it was AMAZEBALLS.
BEST Tiramisu from America's Test Kitchen 16-101913
BEST Tiramisu from America's Test Kitchen 6--101913
I find that the deeper I trudge into the wilds of study hermitage territory, the less refined my language and blogging gets. OH WELL. #girlsjustwannahavefun
(On a sort of related note, I also find that I’m much more comfortable now with not just creating one “writing voice” when I blog, but using whatever writing comes most naturally to me when I scroll through my photos for the day. I love feeling like my photos and I have conversations before I sit down (or stand up, usually, at my bizarre makeshift stand-up desk) to type out my day’s work. Kind of like Gollum and his alter-ego. I’ll let you decide whether or not that’s worrisome. But the main takeaway here is that I hope you guys also feel that these photos and stories together tell more than just their component parts, which is something I’ve been working hard to make happen through my recent photoseries blog posts. (You can check out some of my cool photoseries posts here, here, and here.))
–Aw shucks, it’s almost like I’m getting attached to you guys or something, *sniff.*

BEST Tiramisu from America's Test Kitchen 7-101913BEST Tiramisu from America's Test Kitchen 8-101913

^ Seriously. What the photo said.
BEST Tiramisu from America's Test Kitchen 10-101913
BEST Tiramisu from America's Test Kitchen 11-101913
But back to this tiramisu. I told you not to click away, and here is the big reason. This is not only the very best tiramisu I have ever eaten, or made, or served.
It has received the ultra-rare, more-elusive-than-Atlantis Mommy Stamp of Approval.
Which is basically like if a scientist walked up to you today and proved that dodo birds aren’t really extinct. IT’S REALLY MIND-BLOWING.
BEST Tiramisu from America's Test Kitchen 14-101913
(I love this picture. My dad walked up to me in the middle of my photoshoot–he has been so good about ignoring all of my weird baking/blogging habits–and started dangling my Stitch pillow pet in all sorts of poses over the tiramisu. I guess Stitch needs tiramisu lovin’, too ❤ )
I made it for my mom’s birthday, and after taking a bite, she held onto her fork, turned around to face me, and said, “You can open a bakery now.”
This coming from the lady who is assured that all I do in the kitchen is spawn devil pups all day, Or something. I mean, what ELSE could I be doing in the kitchen that could make it “so so so messy,” right?
Just kidding. I love you, Mom!
BEST Tiramisu from America's Test Kitchen 18-101913
I have to vouch for this recipe 100% to the 50 bajillionth power. Everybody who ate it loved it–plus the recipe is make-ahead friendly, no-bake, and just so darn good. It’s slightly sweeter than most other tiramisu recipes I’ve tried, and I added a lot more Kahlua/coffee than the original recipe called for (there is no such thing as too much Kahlua here!)–I’ve noted the suggested changes in the recipe below–but otherwise this recipe is THE. VERY. BEST. If my strangely experimental cross-lit edited photos and less than witty taglines have not convinced you of this fact already. (Give a girl a break, will ya?)
BEST Tiramisu from America's Test Kitchen 22-101913
I got my forks. And I got my stretchy sweatpants on. Check, and check.
Now go do yourself a favor and go make this tiramisu. And then make sure you stop by the post office to pick up a box big enough to hold a cooler and this cake. I will even offer to pay for postage, if you get my drift. Heh.
BEST Tiramisu from America's Test Kitchen 23-101913BEST Tiramisu from America's Test Kitchen 24-101913
BEST Tiramisu from America's Test Kitchen 27-101913
BEST Tiramisu from America's Test Kitchen 29-101913
Happy Stretchy Sweatpants Tiramisu Day, every day!

Ala Tuesday Talent Show Link Party at Chef in Training! It is held weekly and has some amazing link ups!

Will Cook For Smiles

1

The Very BEST Tiramisu–America’s Test Kitchen
Yield: 9×13-inch baking dish
Original recipe below from America’s Test Kitchen. Alterations to the recipe or comments made by me are indicated in blue.
Ingredients:
  • 2-1/2 cups strong brewed coffee, room temperature
  • 1-1/2 Tablespoons instant espresso granules–I had instant coffee granules on hand and used about 4 tablespoons of that instead.
  • 9 tablespoons dark rum–I added about a tablespoon or two extra Kahlua in step 2.
  • 6 large egg yolks
  • 2/3 cup sugar
  • 1/4 teaspoon table salt
  • 1-1/2 pounds mascarpone
  • 3/4 cup cold heavy cream
  • 14 ounces (42 to 60, depending on size) dried ladyfingers (savoiardi)–note: you will want to buy the hard variety of ladyfingers.
  • 3-1/2 Tablespoons cocoa, preferably Dutch-processed
  • 1/4 cup grated semisweet or bittersweet chocolate (optional)

Directions:

1. Stir coffee, espresso, and 5 tablespoons rum in a wide bowl or baking dish until espresso dissolves; set aside.

2. In bowl of standing mixer fitted with whisk attachment, beat yolks at low speed until just combined. Add sugar and salt and beat at medium-high speed until pale yellow, 1-1/2 to 2 minutes, scraping down bowl with rubber spatula once or twice. Add remaining 4 tablespoons rum and beat at medium speed until just combined, 20 to 30 seconds; scrape bowl. Add mascarpone and beat at medium speed until no lumps remain, 30 to 45 seconds, scraping down bowl once or twice. Transfer mixture to large bowl and set aside.

3. In now-empty mixer bowl (no need to clean bowl), beat cream at medium speed until frothy, 1 to 1-1/2 minutes. Increase speed to high and continue to beat until cream holds stiff peaks, 1 to 1-1/2 minutes longer. Using rubber spatula, fold one-third of whipped cream into mascarpone mixture to lighten, then gently fold in remaining whipped cream until no white streaks remain. Set mascarpone mixture aside.

4. Working one at a time, drop half of ladyfingers into coffee mixture, roll, remove and transfer to 13 by 9-inch glass or ceramic baking dish–I used one 9×9-inch springform baking pan (it makes for a great appearance) and one 4×6-inch casserole dish. (Do not submerge ladyfingers in coffee mixture; entire process should take no longer than 2 to 3 seconds for each cookie.) Arrange soaked cookies in single layer in baking dish, breaking or trimming ladyfingers as needed to fit neatly into dish.–Helpful tip: What the instructions mean hear is basically that you should lightly and quickly roll your ladyfingers in the coffee mixture; don’t dunk them in for a long period of time, or they will get soggy in your tiramisu.

5. Spread half of mascarpone mixture over ladyfingers; use rubber spatula to spread mixture to sides and into corners of dish and smooth surface. Place 2 tablespoons cocoa in fine-mesh strainer and dust cocoa over mascarpone.

6. Repeat dipping and arrangement of ladyfingers; spread remaining mascarpone mixture over ladyfingers and dust with remaining 1-1/2 tablespoons cocoa. Wipe edges of dish with dry paper towel. Cover with plastic wrap and refrigerate 6 to 24 hours. Sprinkle with grated chocolate, if using; cut into pieces and serve chilled.

14 Comments

Filed under Baked Goods and Desserts, Cakes & Cupcakes